The YSoft Card Reader Tool
About
This document describes the configuration tool version 1.2.0 for YSoft USB Card Readers v2/v3
The tool consists of the following parts:
Configuration
-
A list of connected readers with basic details
-
Operations on one or multiple selected readers
-
Configure readers (Custom configuration, Reader protocol, USB mode, Debug setting, etc.)
-
Update main firmware
-
Update service firmware
-
-
Show full reader details
-
Download reader log
Reading test
-
A list of connected readers with the last read card number and card type
-
Save read logs as a text file
Advaced Configuration
-
A list of connected readers with the last read of YSoft Configuration Card label
-
Format compatible cards as YSoft Configuration Card
-
Define the configuration content for Configuration Card (import existing configuration, define custom configuration, reader protocol, device configuration, card label, etc.)
-
Custom configuration can be:
-
Loaded from a text file
-
Manually defined
-
Reused from predefined protocols
-
Repeatedly evaluated and tested on connected readers
-
Stored to connected readers
-
-
Write the configuration to Configuration Card or export to disk
Advanced configuration is intended for advanced users/experts only and is described in a separate document.
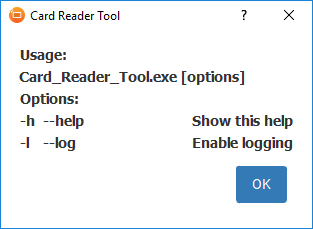
Command Line Parameters Overview
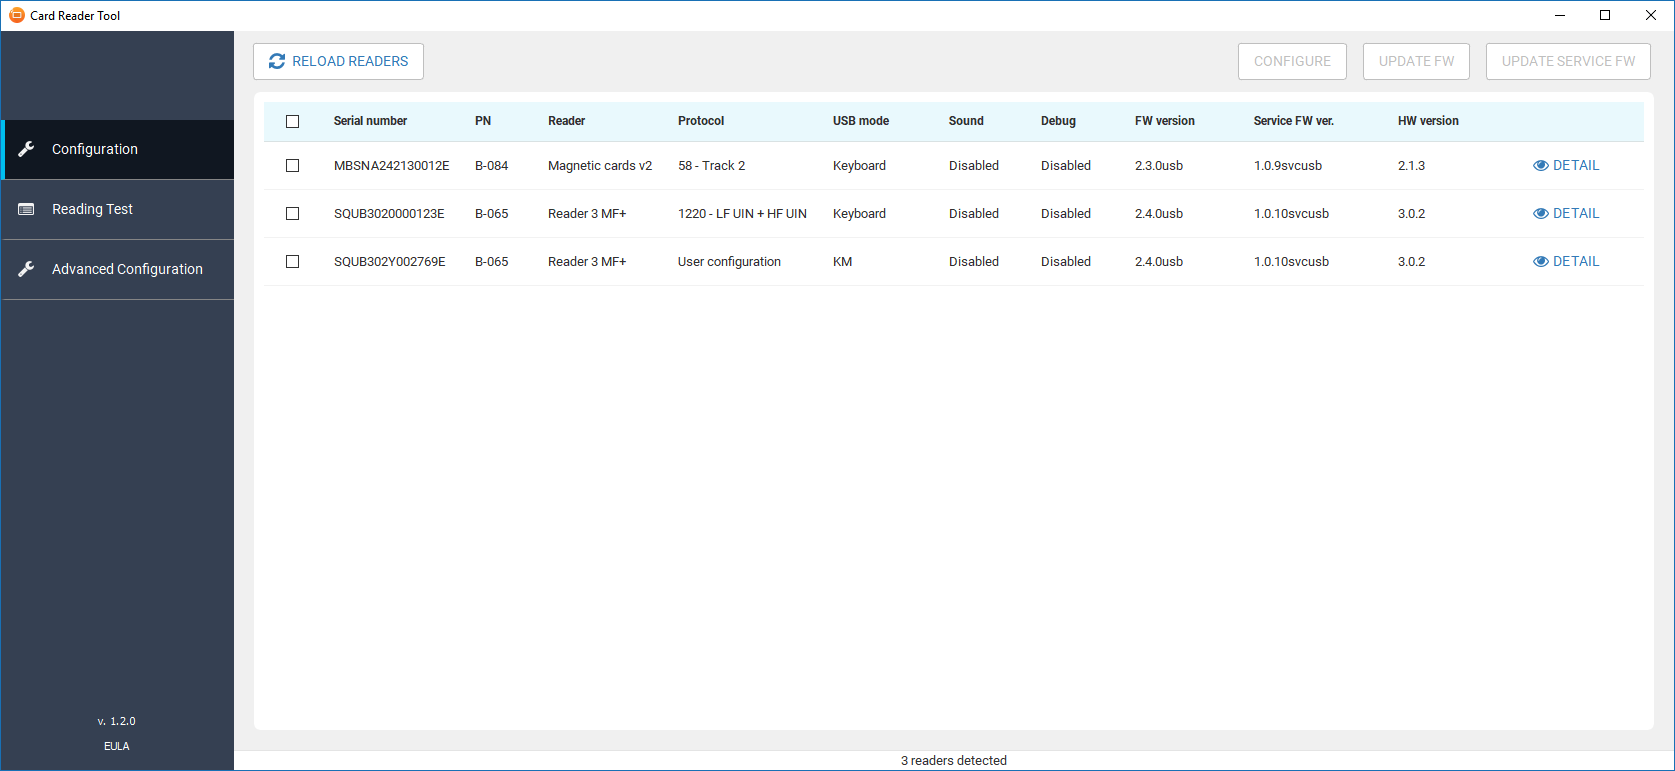
Configuration Page Overview
1. Connected Card Readers

The table is sortable. Sort by the desired column by clicking its header.
Operations are performed on selected readers. Select them by clicking the select checkbox, or anywhere on the line (except the detail button).
The checkbox at the upper left-hand side acts as Select/Deselect all
2. Reload readers (F5)
Refresh the list of connected readers using the Reload readers button.
3. Configure Selected Card Readers
Open the configuration dialog for the selected card readers using the Configure button. Card Reader Configuration.
4. Update Firmware on Selected Card Readers
Open the update firmware dialog for the selected card readers using the Update FW button.
Firmware update
Click Browse, then select the latest firmware package, and click Update.
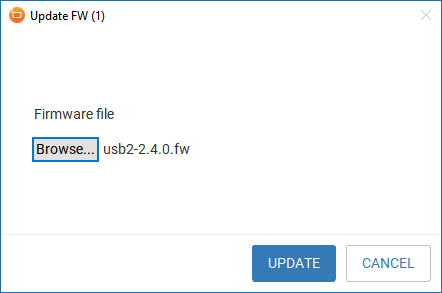
Starting from firmware 2.3.0, it is necessary to manually update the service firmware of the USB reader at least to version 1.0.9
With any older versions, 2.3.0 and newer firmware will not be recognized as valid firmware.
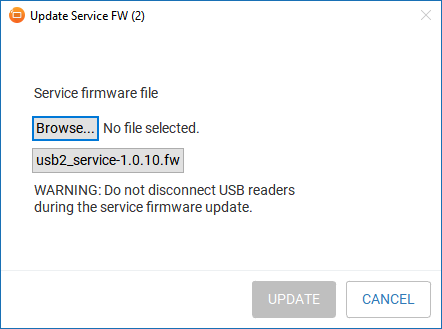
5. Update Service Firmware on Selected Card Readers
Open the service update firmware dialog for the selected card readers using the Update Service FW button.
Service firmware update
Click Browse, then select the latest service firmware package.
Another possibility is to click the button with the name of the embedded service firmware. The embedded firmware file name appears as the selected file.
Then click Update. Do not disconnect USB card readers during the update procedure!
6. Card Reader Detail
Show the card reader detail page using the Detail button:

Copy to Clipboard
Copy the reader details to the clipboard or to a text file.
Save to File
Save reader details to a text file.
Download log
Download logs from the card reader and save to a text file. If the log file is empty, then check if debug mode is correctly set in the configuration.
Card Reader Configuration
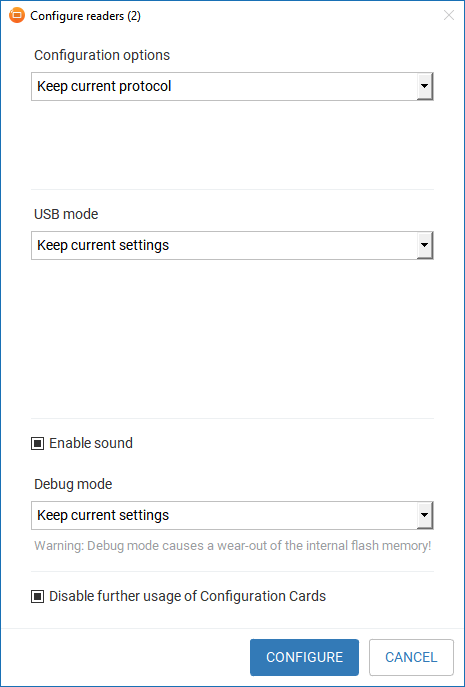
Configuration Options
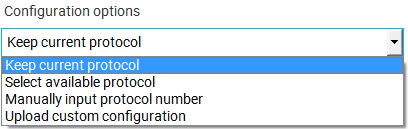
Keep current protocol
Do not change the configured protocol or custom configuration.
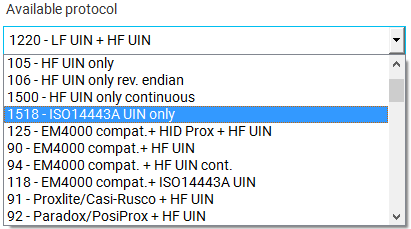
Select available protocol
Select a protocol from the list of available protocols.
When you configure more than one type of card reader at once, this mode is not available. You can set the protocol number manually.
Manually input protocol number
Manually set the protocol number.
Upload custom configuration
Upload a binary file with the custom configuration.
USB Mode
Change the mode of the USB interface.
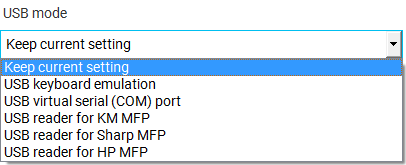
Keep current setting
Do not change the USB mode.
USB keyboard emulation
In this mode, the USB reader works as a standard USB keyboard.
The typing of keys is emulated as a numeric keypad for 0-9 and A-F keys in standard EN/US keyboard layout. If the card number contains any other characters, they are ignored. Caps-lock and Num-lock are enabled and disabled if necessary and returned to their previous state after the card number is read. The "Shift", "Ctrl", and "Alt" keys must not be held during card placement, or it will collide with Caps-lock and Num-lock settings, and an incorrect card number will be read. If an international keyboard layout is used (such as French, Russian, Chinese, or another), a wrong card number will be entered. In such cases, switching to US/EN keyboard layout is necessary before placing the card.
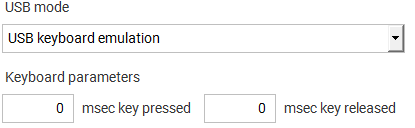
Parameters:
-
msec key pressed
-
msec key released
USB virtual serial (COM) port
This mode emulates the operation of a COM port.
On a Windows platform, installation of the USB reader in this mode requires a usb2-reader.inf file. This file is distributed along with the USB reader firmware and should be selected in the "new hardware" wizard after USB reader plugging/reconfiguration.
On a Linux platform, the driver for the serial port is installed automatically.
USB reader for Konica Minolta MFD
This mode is for Konica Minolta (KM) MFDs.
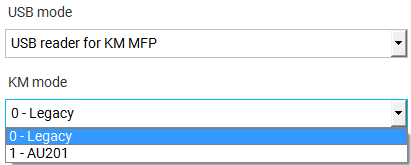
KM mode
-
Legacy – ASCII mode
-
AU201 – binary mode
USB reader for Sharp MFD
This mode is for Sharp MFDs.
USB reader for HP MFD
This mode is for HP MFDs. It is not supported on USB v2 card readers.
USB reader in HID raw mode
This mode is intended for special cases.
Enable sound
Values:
-
 - Enable Sound
 -
 - Disable sound
 -
 - Do not change sound configuration
Debug mode
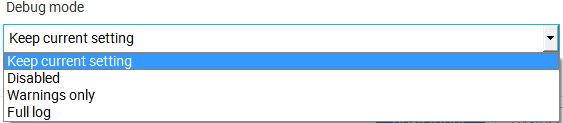
Values:
-
Keep current setting – do not change the logging configuration
-
Disabled – logging is disabled
-
Warnings only – only log warning messages
-
Full log – debug logging.
Debug logging causes a wear-out of the internal flash memory. For short-term use only.
The log is a 32Kb circular buffer with 10k erase cycles. Card reader operation with worn-out flash memory has not been verified.
Disable further usage of Configuration Cards
Values:
-
 - Disable further usage of Configuration Cards
 -
 - Enable further usage of Configuration Cards
 -
 - Do not change the configuration setting
Reading Test
In this section, you can test the reading of your card readers and save testing results to a file. Multiple card readers can be tested at once.
When the status of the card reader is OK, you can start placing cards on the card reader.
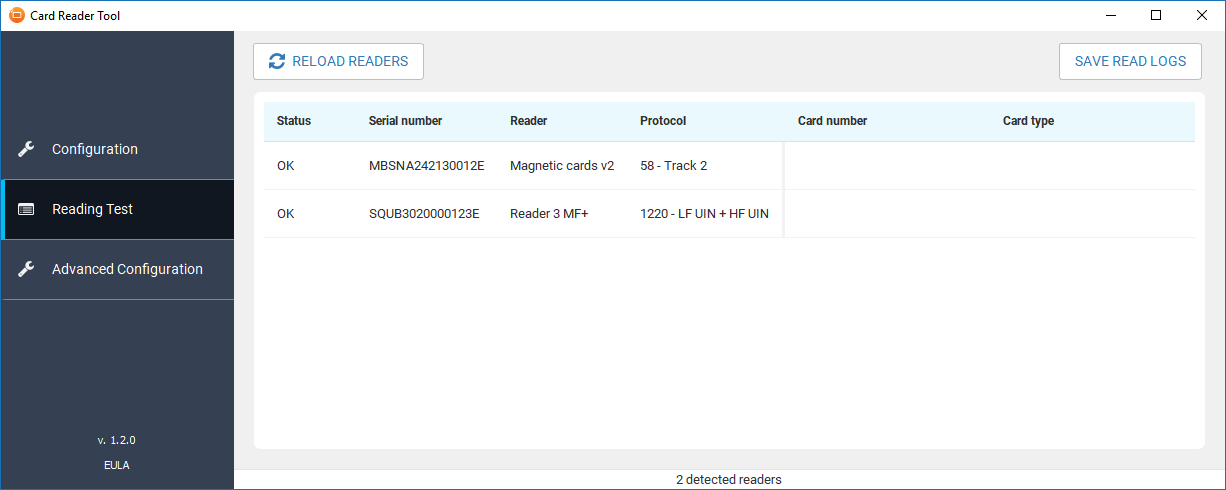
Reload readers (F5)
Refresh the list of connected readers and clean the card reading log.
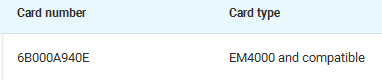
Card number and type
You can find the number and type of the last placed card.
When using in KM mode, the card number also includes MFP data emitted from a loadable driver (in parenthesis).
Save Read Logs
Download a log of all cards numbers read by the card readers using the Save Read Logs button.
Log example

YSoft Card Reader Tool Advanced Configuration
Starting from version 1.2 of YSoft Card Reader Tool, it is possible to create or upload an advanced configuration for Konica Minolta card readers. The advanced configuration includes:
-
Customized card reading
-
Device operational parameters
-
Creating of custom configuration cards
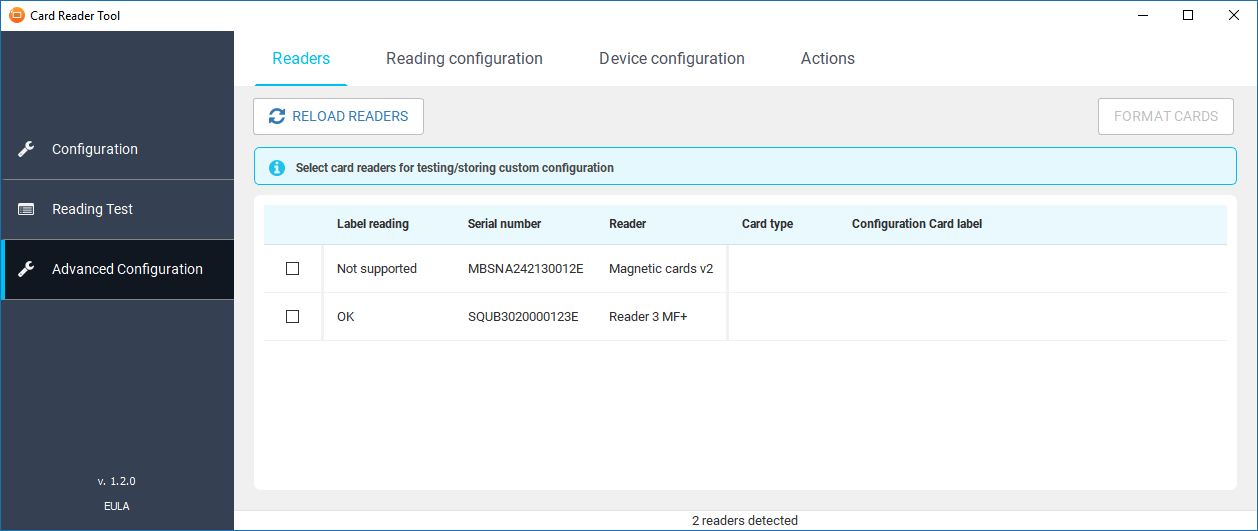
A step-by-step guide for advanced configuration
Step 1:
Select which reader you want the advanced configuration tested on in the next reading configuration dialog. This step can be omitted if no testing is required.
Step 2:
Select the card reader configuration either by:
-
Custom card reader configuration. See below for a custom configuration step-by-step.
-
Or by protocol selection from the list of protocols.
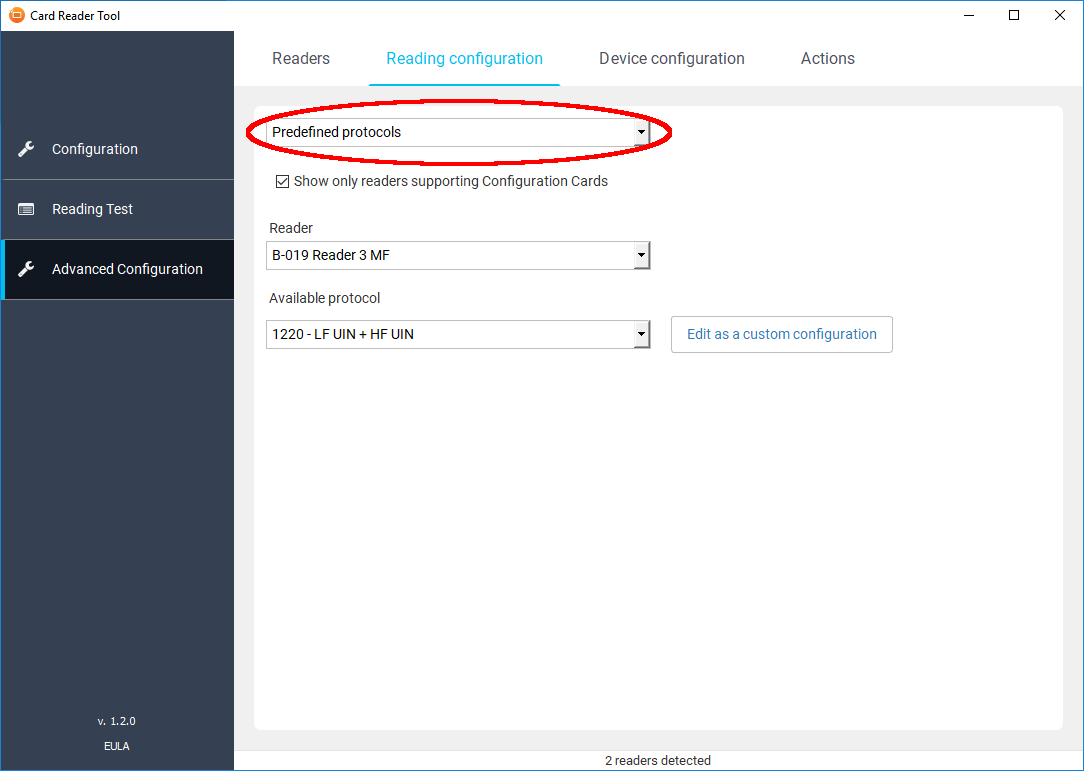
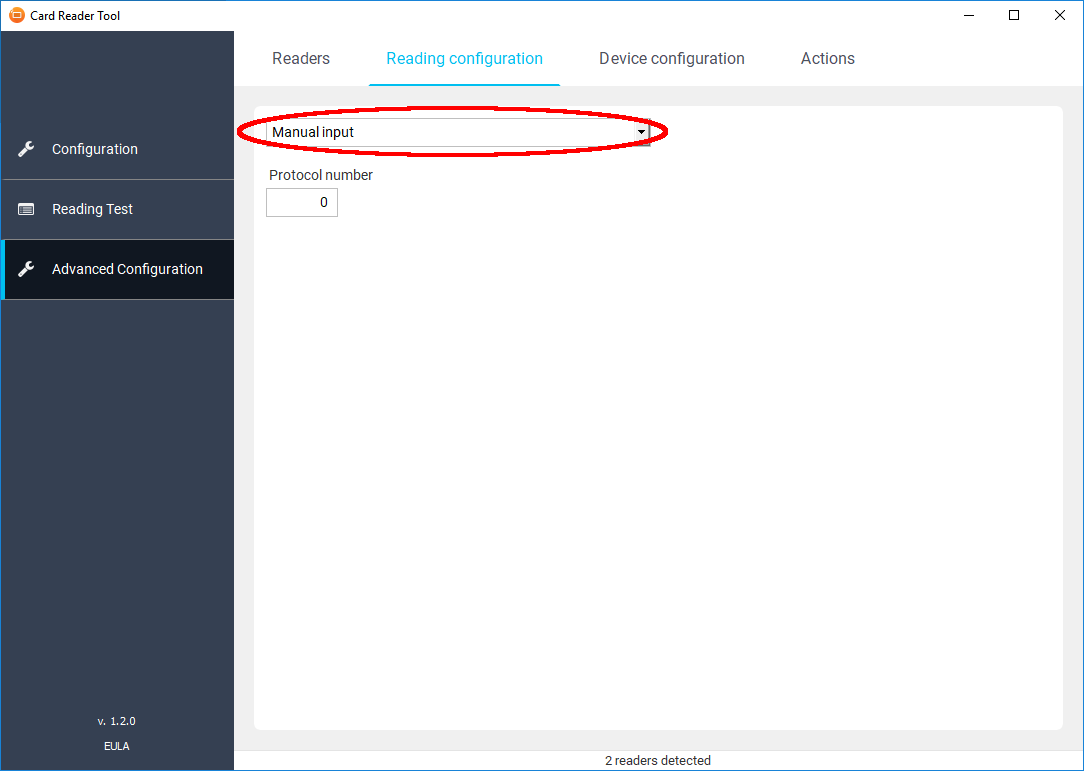
-
Or by manual protocol selection by protocol number.
Step 3:
Select device configuration.
May be left without any change if no changes are required. Items correspond to the options in the configuration dialog.

Step 4:
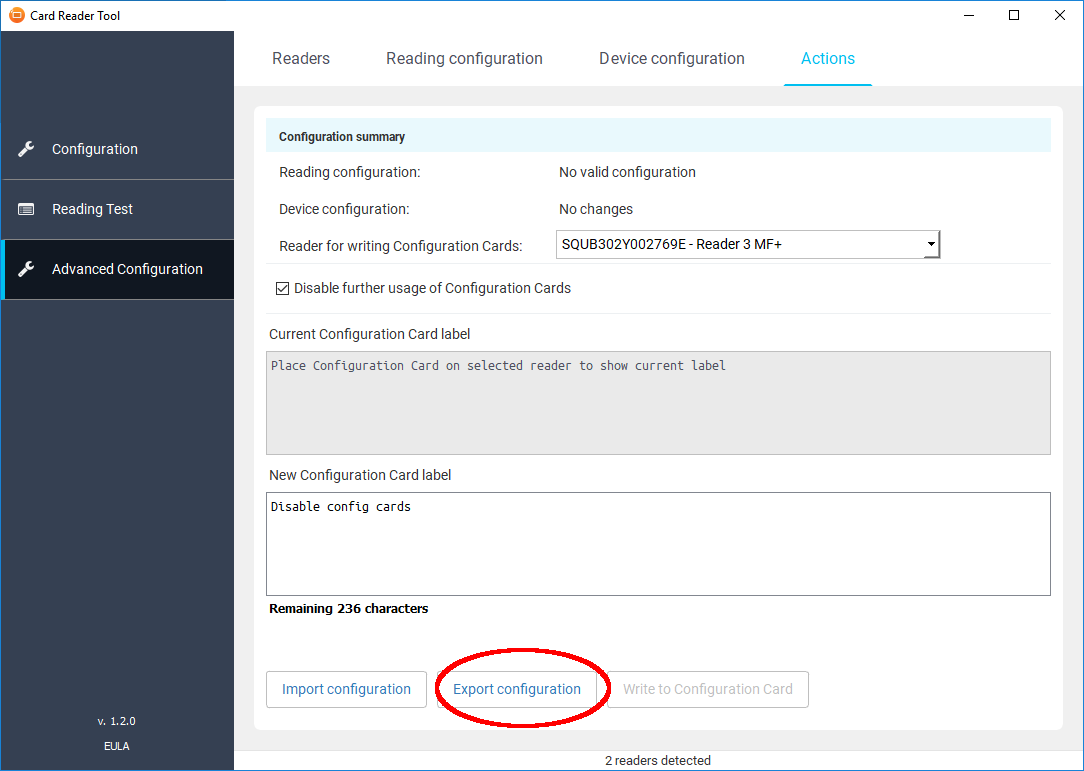
Save the configuration
a) Save the configuration to a file by clicking export configuration. The file can be later used in the Configuration > Configure dialog > Upload custom configuration.
b) Or the config can be written on a configuration card, see below for step-by-step configuration cards.
Users may start with already existing custom configuration. Then it is possible to import it and define only the overriding changes. Redefining custom configuration is not supported.
Step-by-step configuration cards
See the "Card Reader Custom Configuration" document for details and limitations about the configuration cards usage. Please ask your sales representative for the document.
Configuration Cards are supported from firmware version 2.4.0 on these readers only:
-
USB Reader 3 MF
-
USB Reader 3 MF+
-
USB Reader 3 MF SAM
-
USB Reader 3 MF&Legic
Step 1: Format empty card.
Place the compatible card and click FORMAT CARDS. This step is skipped if the card is already formatted.
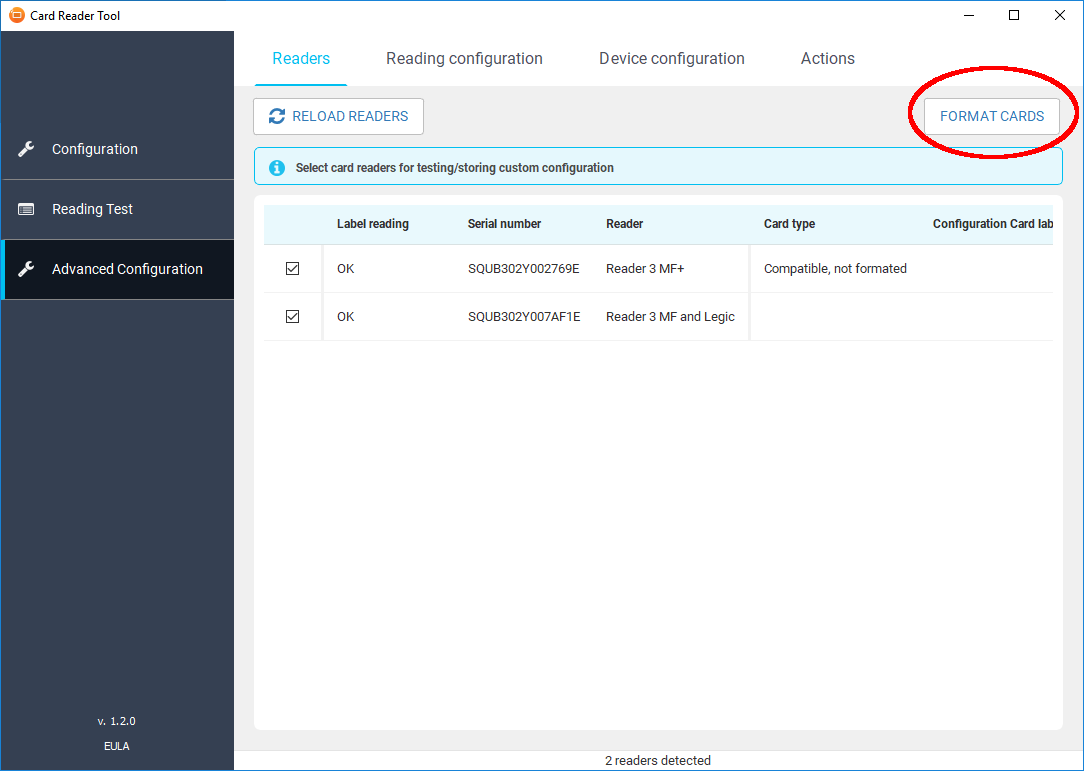
Compatible cards are:
-
Mifare DESFire EV1 8k
-
Mifare DESFire EV2 8k
The card must have a default master key (like a blank card) before formatting.
Formatting will erase all data stored on the card.
Step 2: Prepare reading configuration and device configuration (see above)
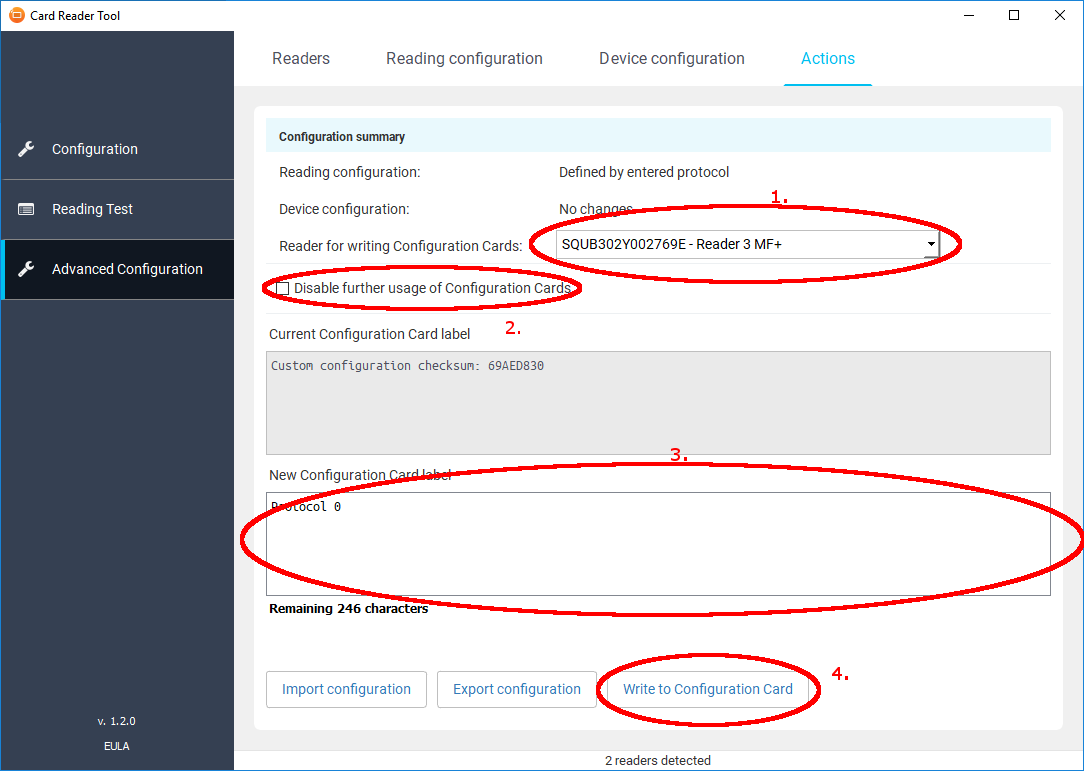
Step 3: Write the configuration onto a card
-
Select the reader you wish to write the config card on and place the formatted config card on it.
-
Select if you want to disable the further processing of the configuration cards. Generally, it is not safe to leave it on. However, for debug and testing purposes, it is better to leave it enabled.
-
Edit the card label. The label is initially generated based on the configuration settings, however, it can be changed to anything to suit customer needs. The label can be read back by an NFC-enabled mobile phone or tablet.
-
Write the configuration card
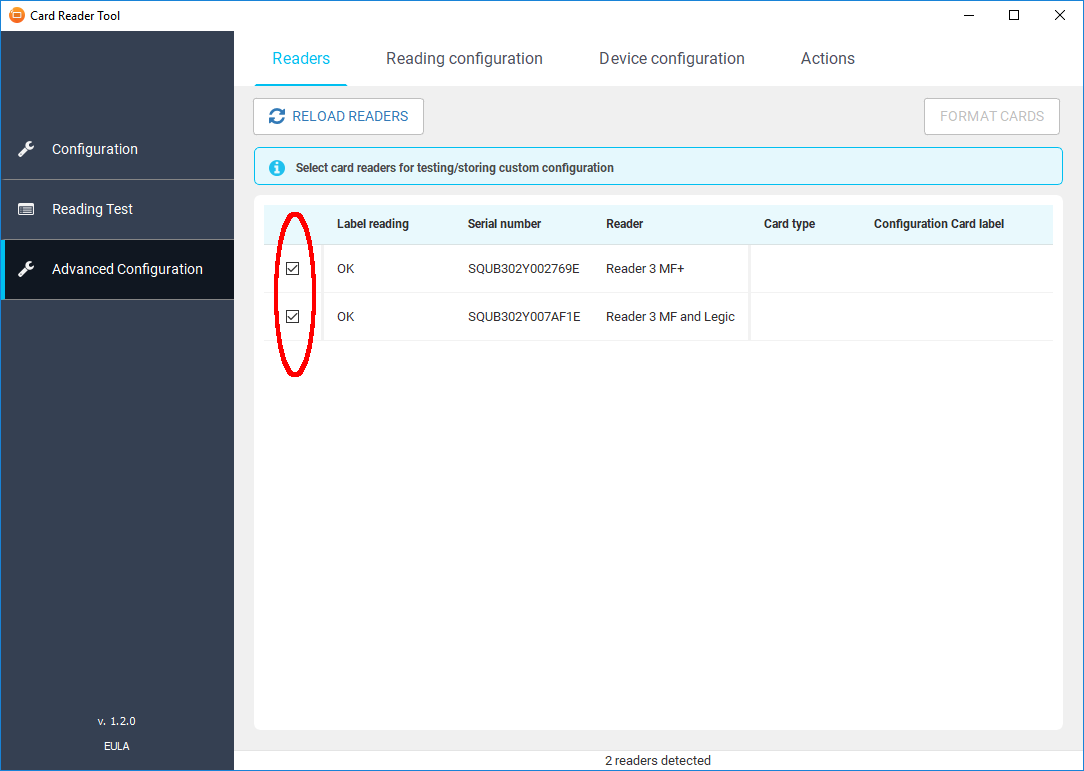
Step-by-step custom card reader configuration
Step 1:
Select the card readers you want the custom configuration tested on:

Step 2:
Make sure you have card readers selected.
a) Load a custom configuration text file, or
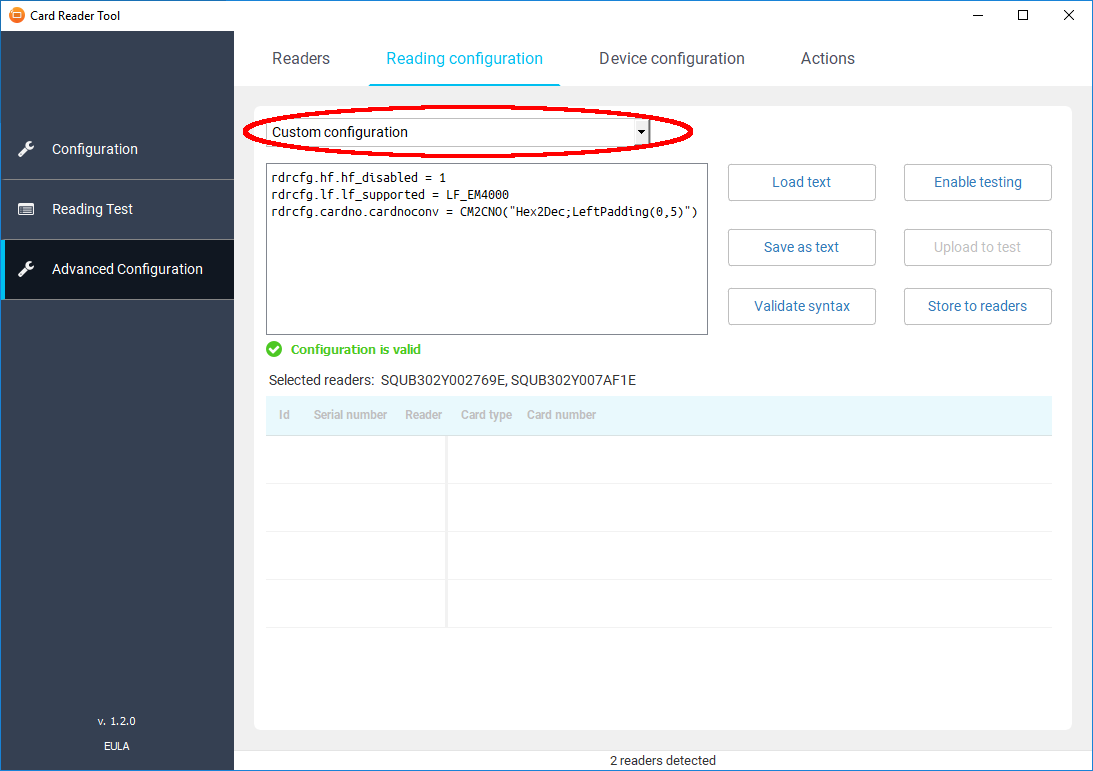
b) Edit the custom configuration in the text box, or
c) You can use the "Edit as custom configuration" button on the selection of protocols.
See the "Card Reader Custom Configuration" document for details about what can be used as a custom configuration. Please ask your sales representative for the document.
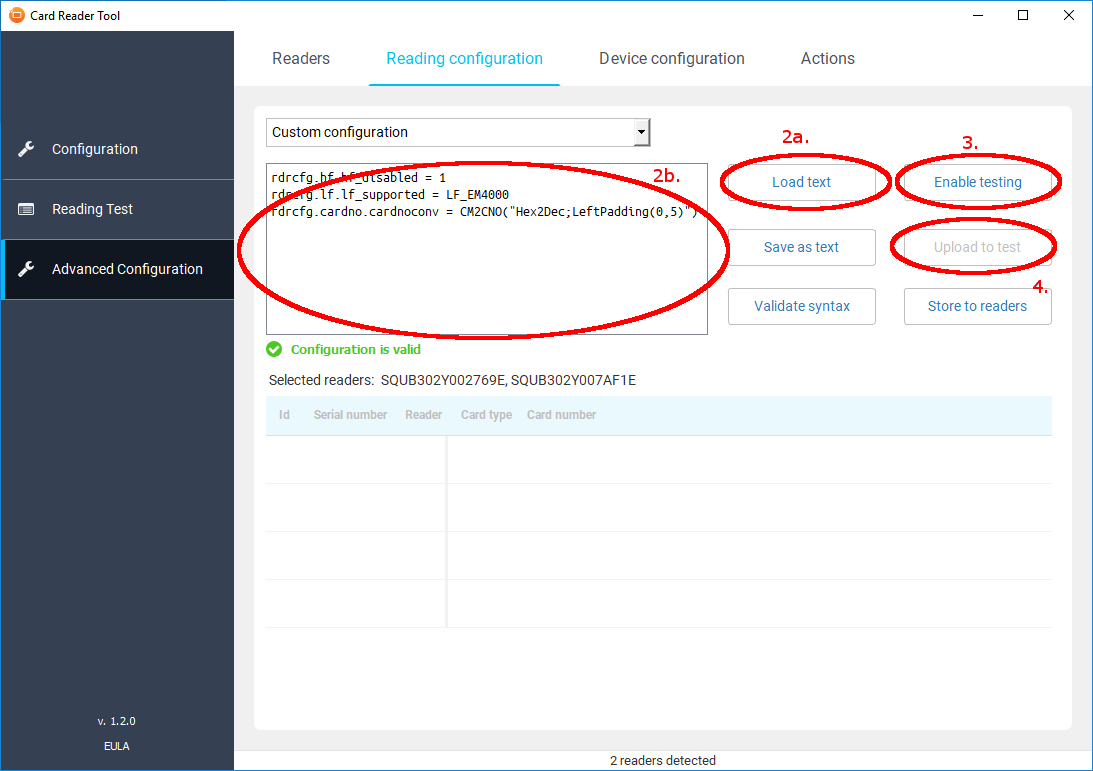

Step 3: Click Enable testing
The reader now read cards in its original configuration. You may place the card and check the result on the list below.
Step 4: Click Upload to test.
Place the card and check the result on the list below. If you are not satisfied with the result and want to modify the custom configuration, just edit it and repeat step 4 – click the upload button.
Using configuration card to configure Konica Minolta USB Card Reader
Supported Card Readers
-
Konica Minolta USB Card Reader 3 MF
-
Konica Minolta USB Card Reader 3 MF+
-
Konica Minolta USB Card Reader 3 MF&Legic
-
Konica Minolta USB Card Reader 3 MF SAM
Requirements
-
Firmware version 2.4.0 or higher
-
HF technology must be enabled either by protocol selection or in custom card reader configuration (enabled by default)
-
Configuration cards processing is enabled in device configuration (enabled by default)
-
Configuration cards work only within 2 minutes from the device power-up or restart
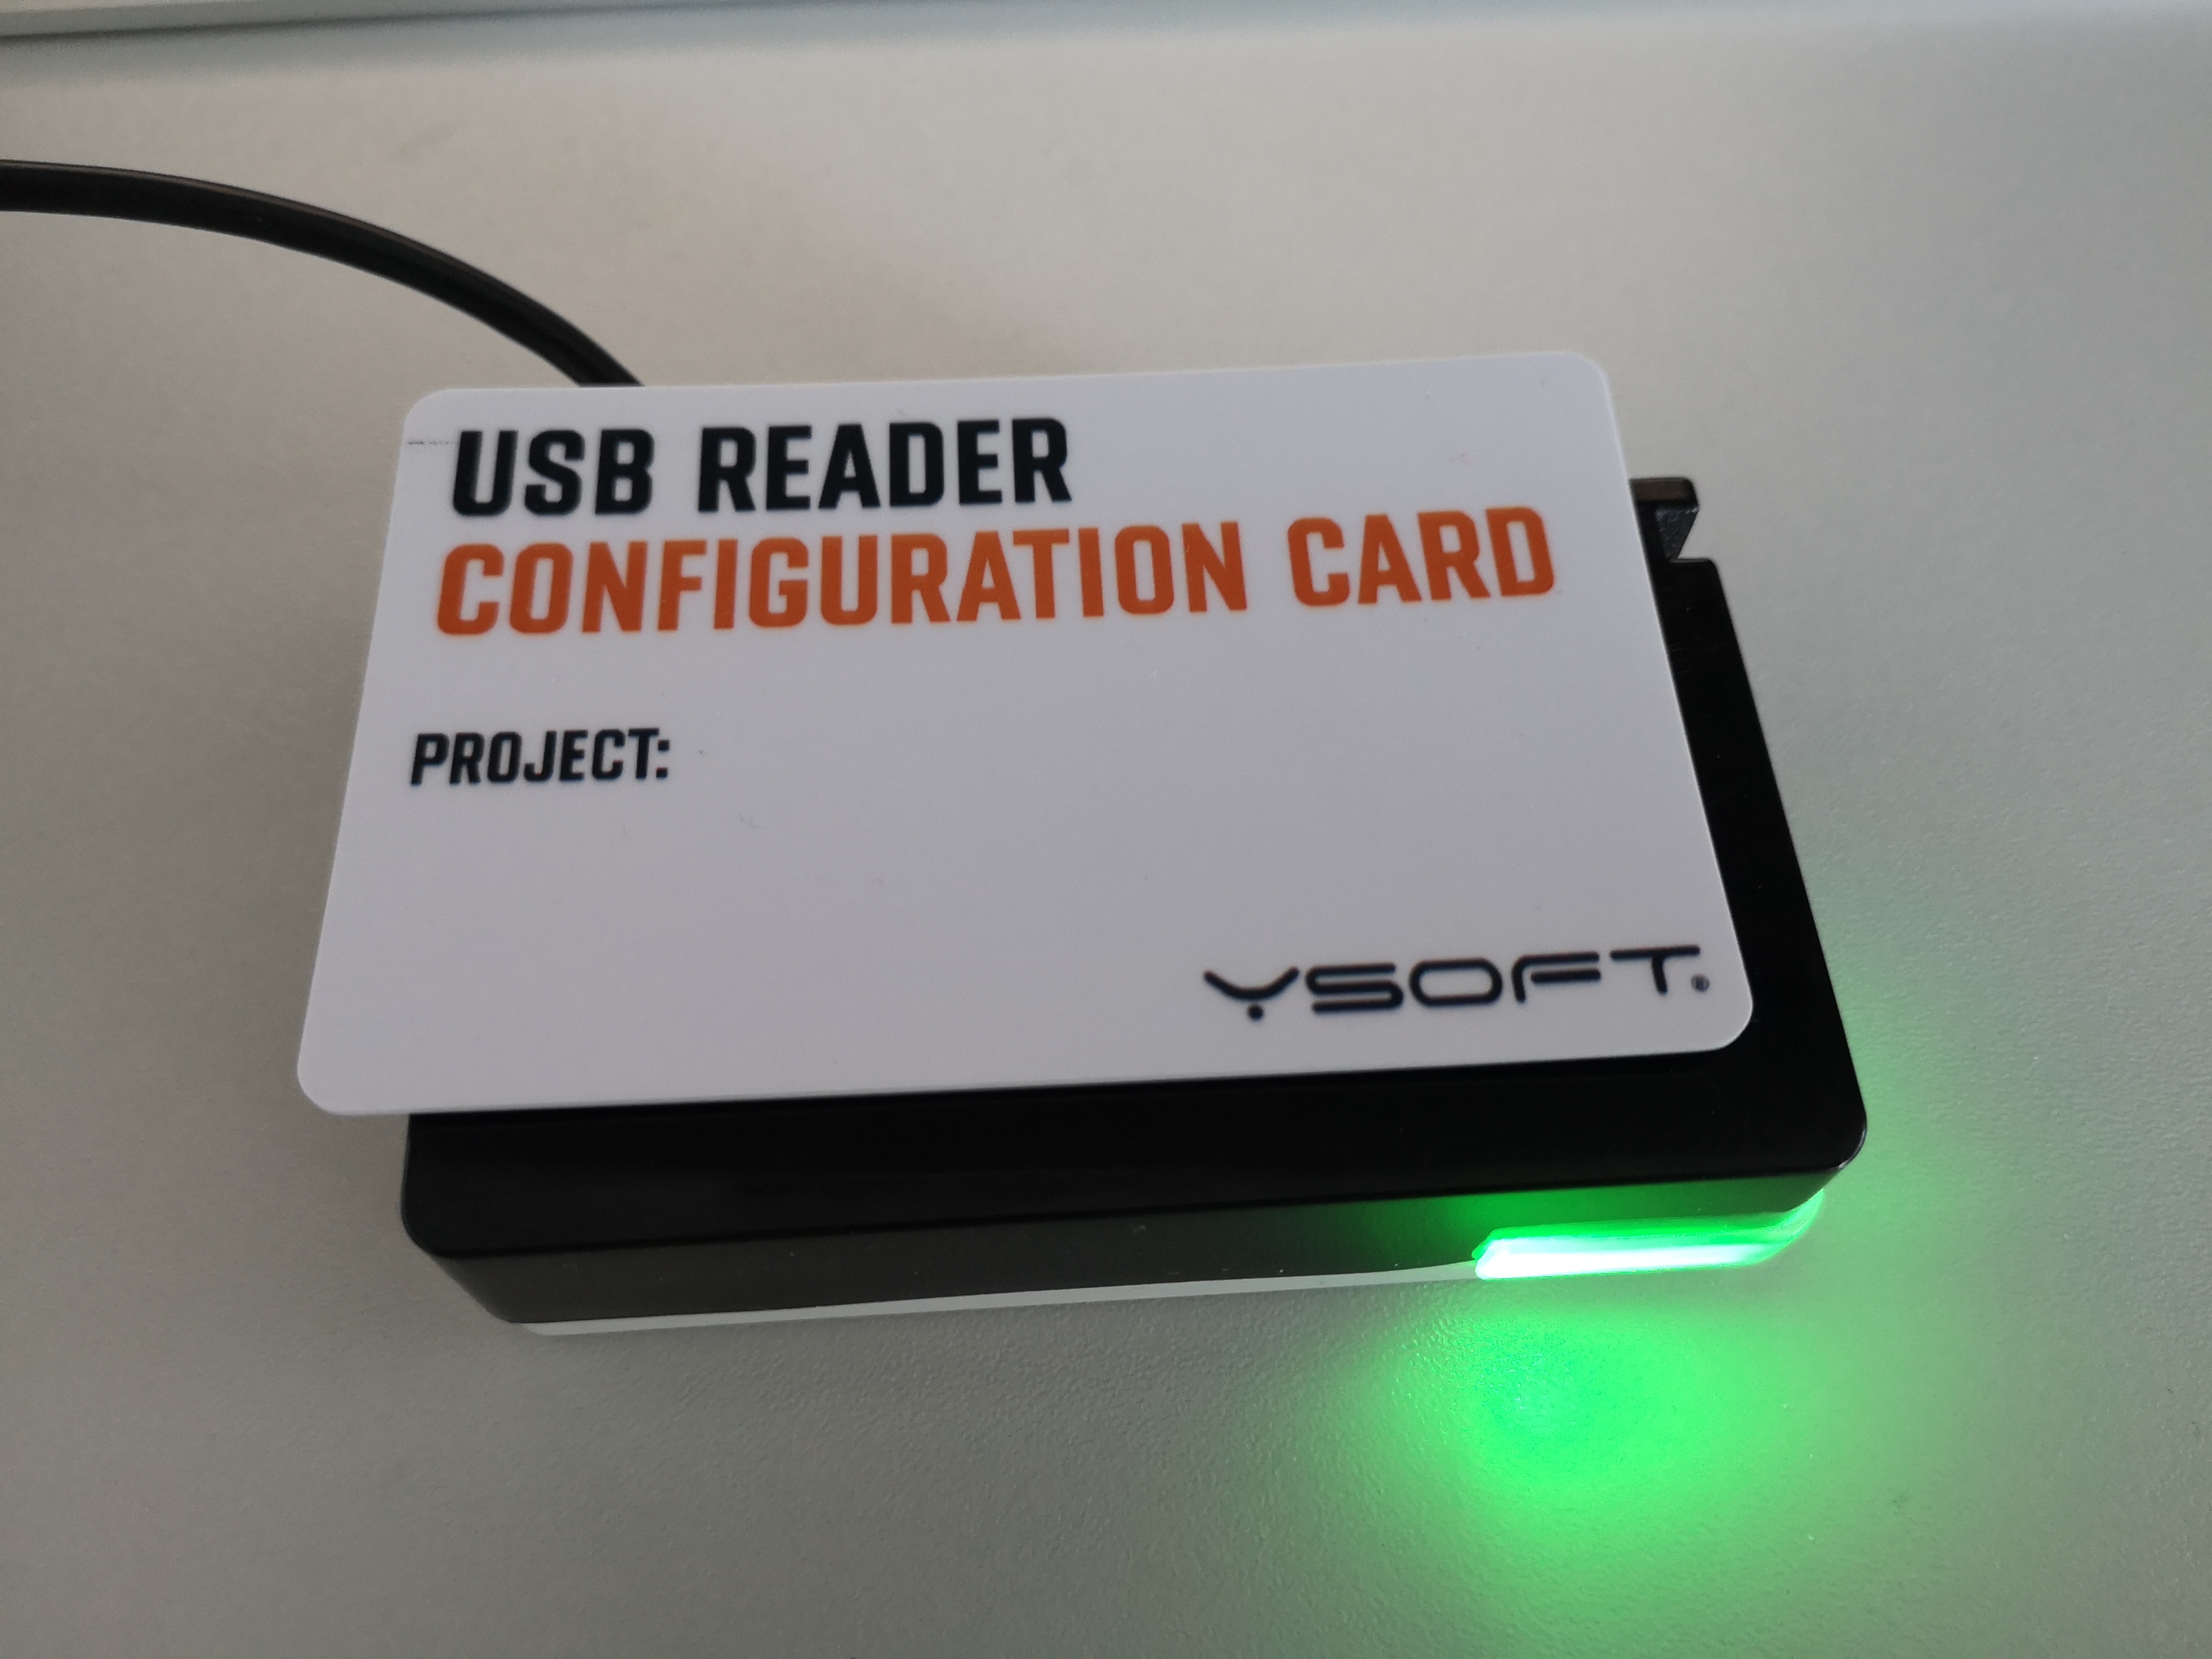
Put configuration card on a card reader
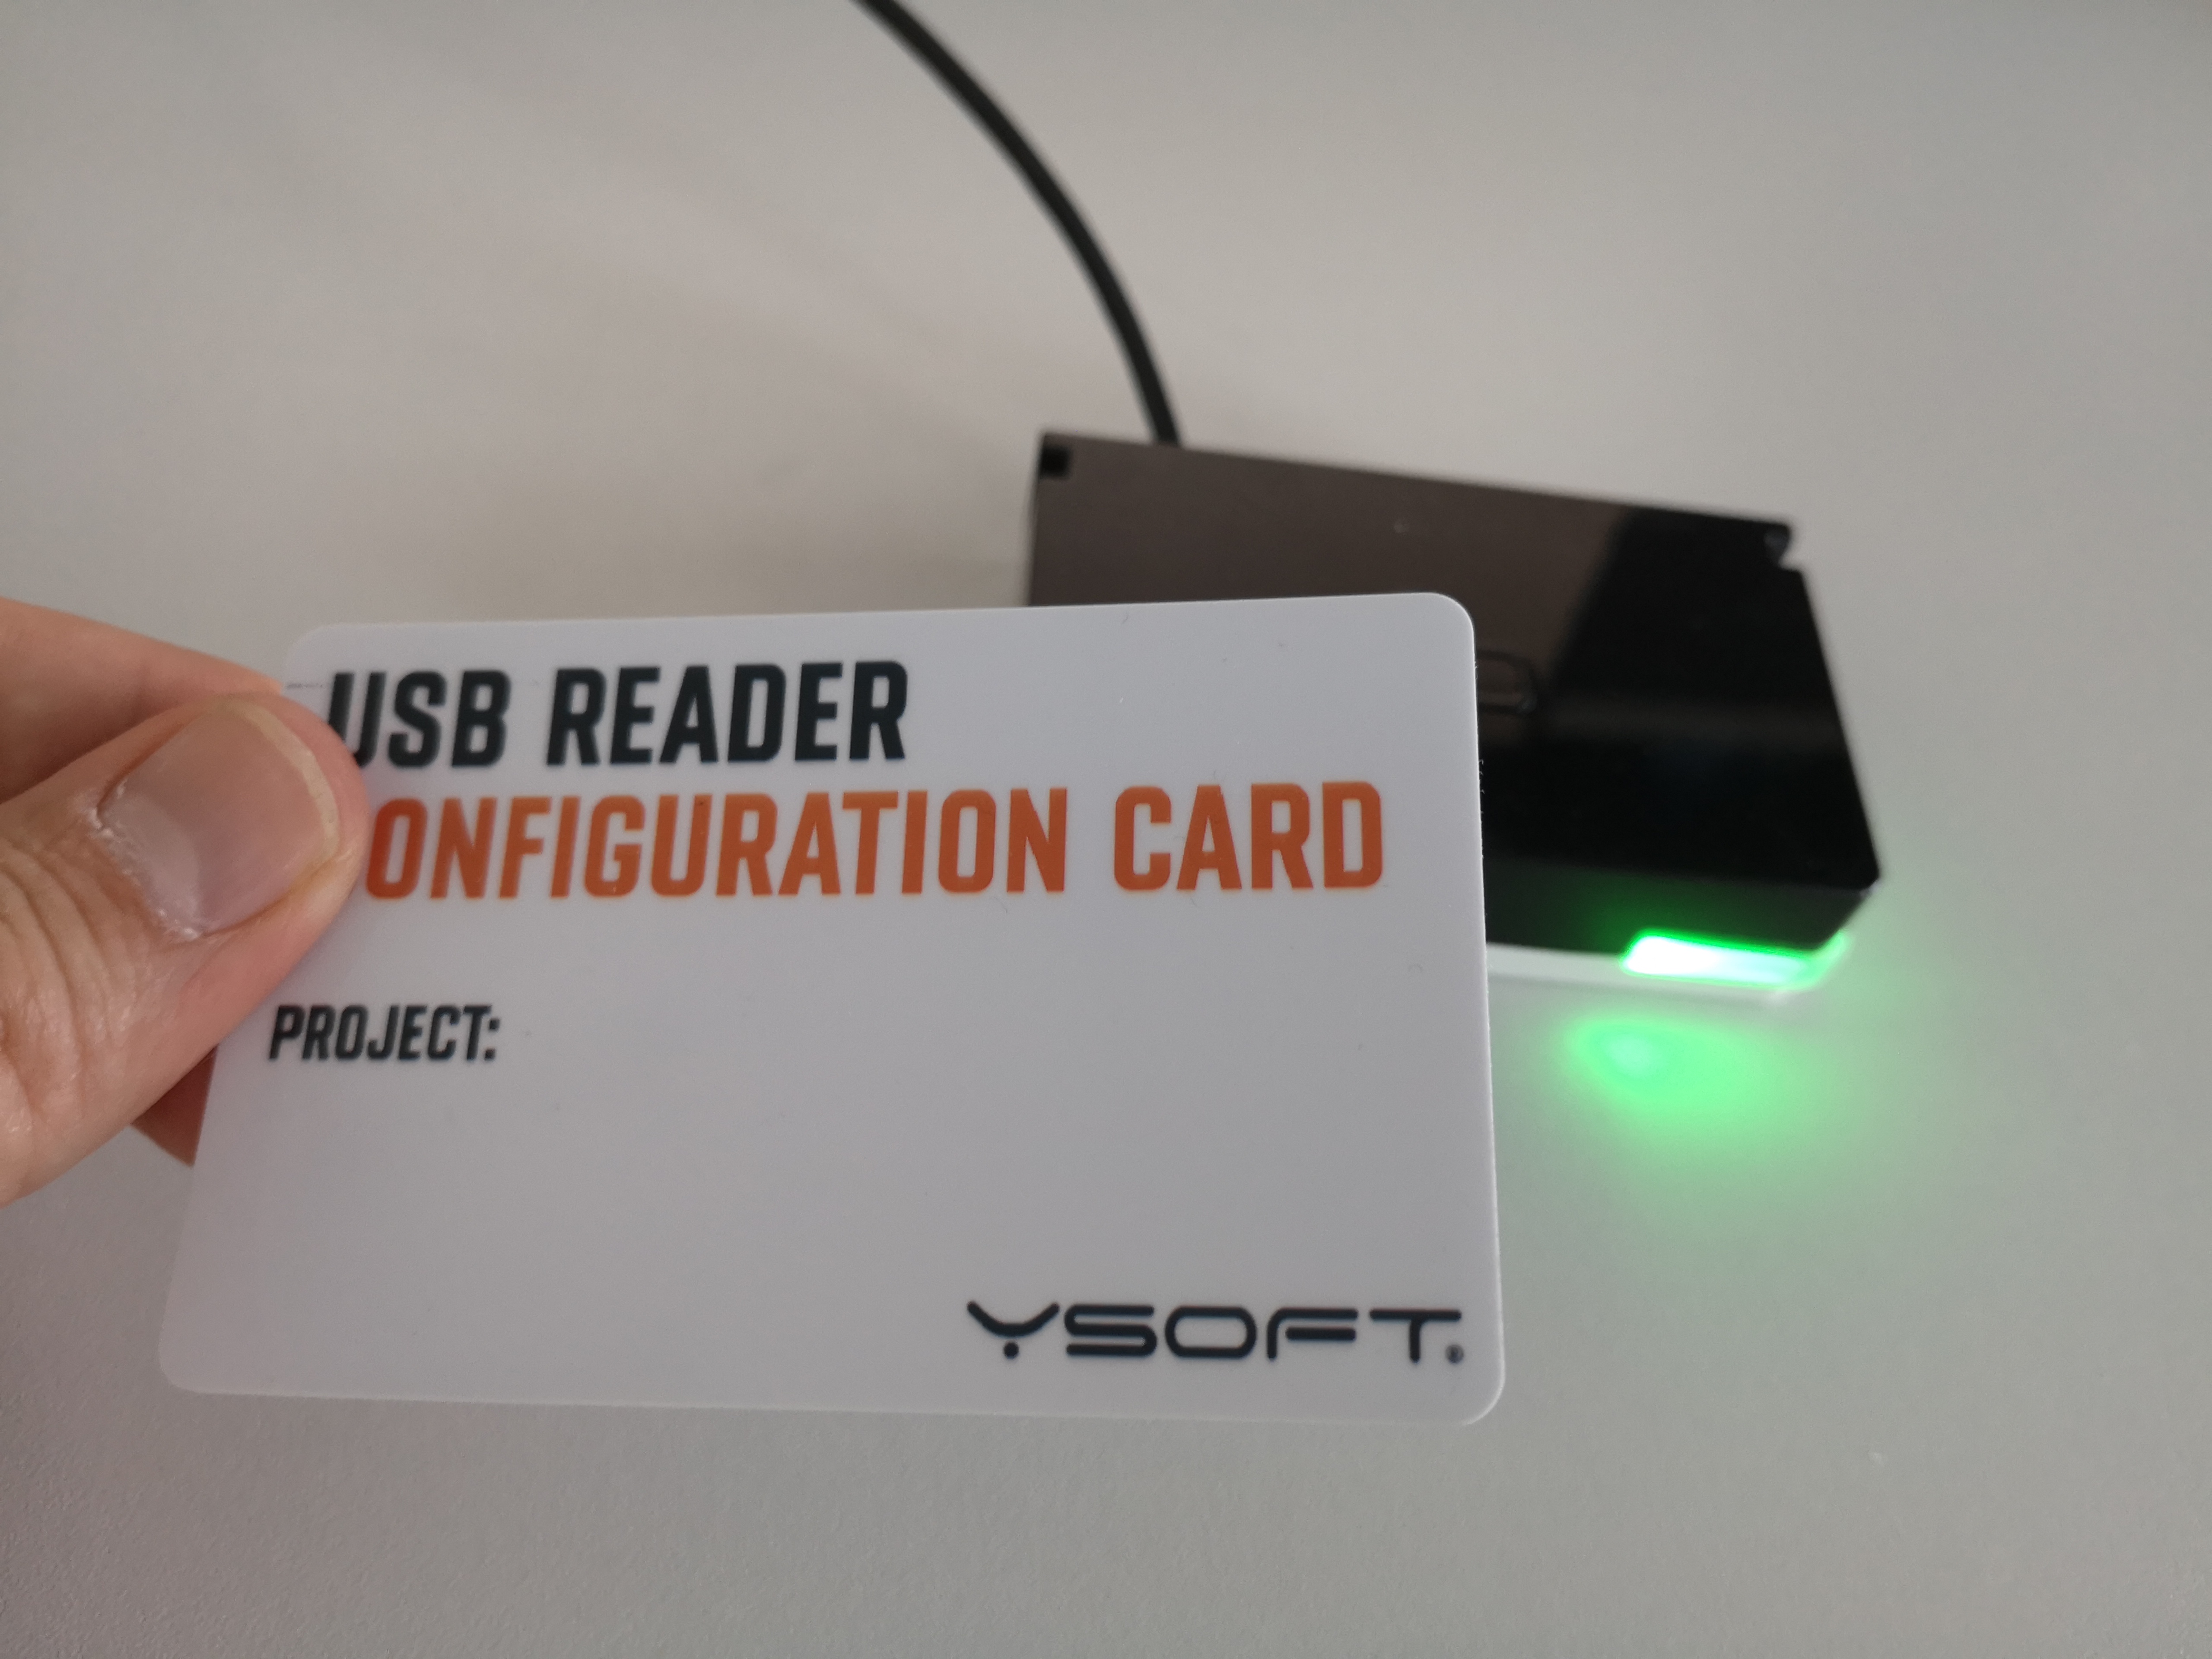
Wait 15 seconds
Card reader programming is indicated by blue LED color.
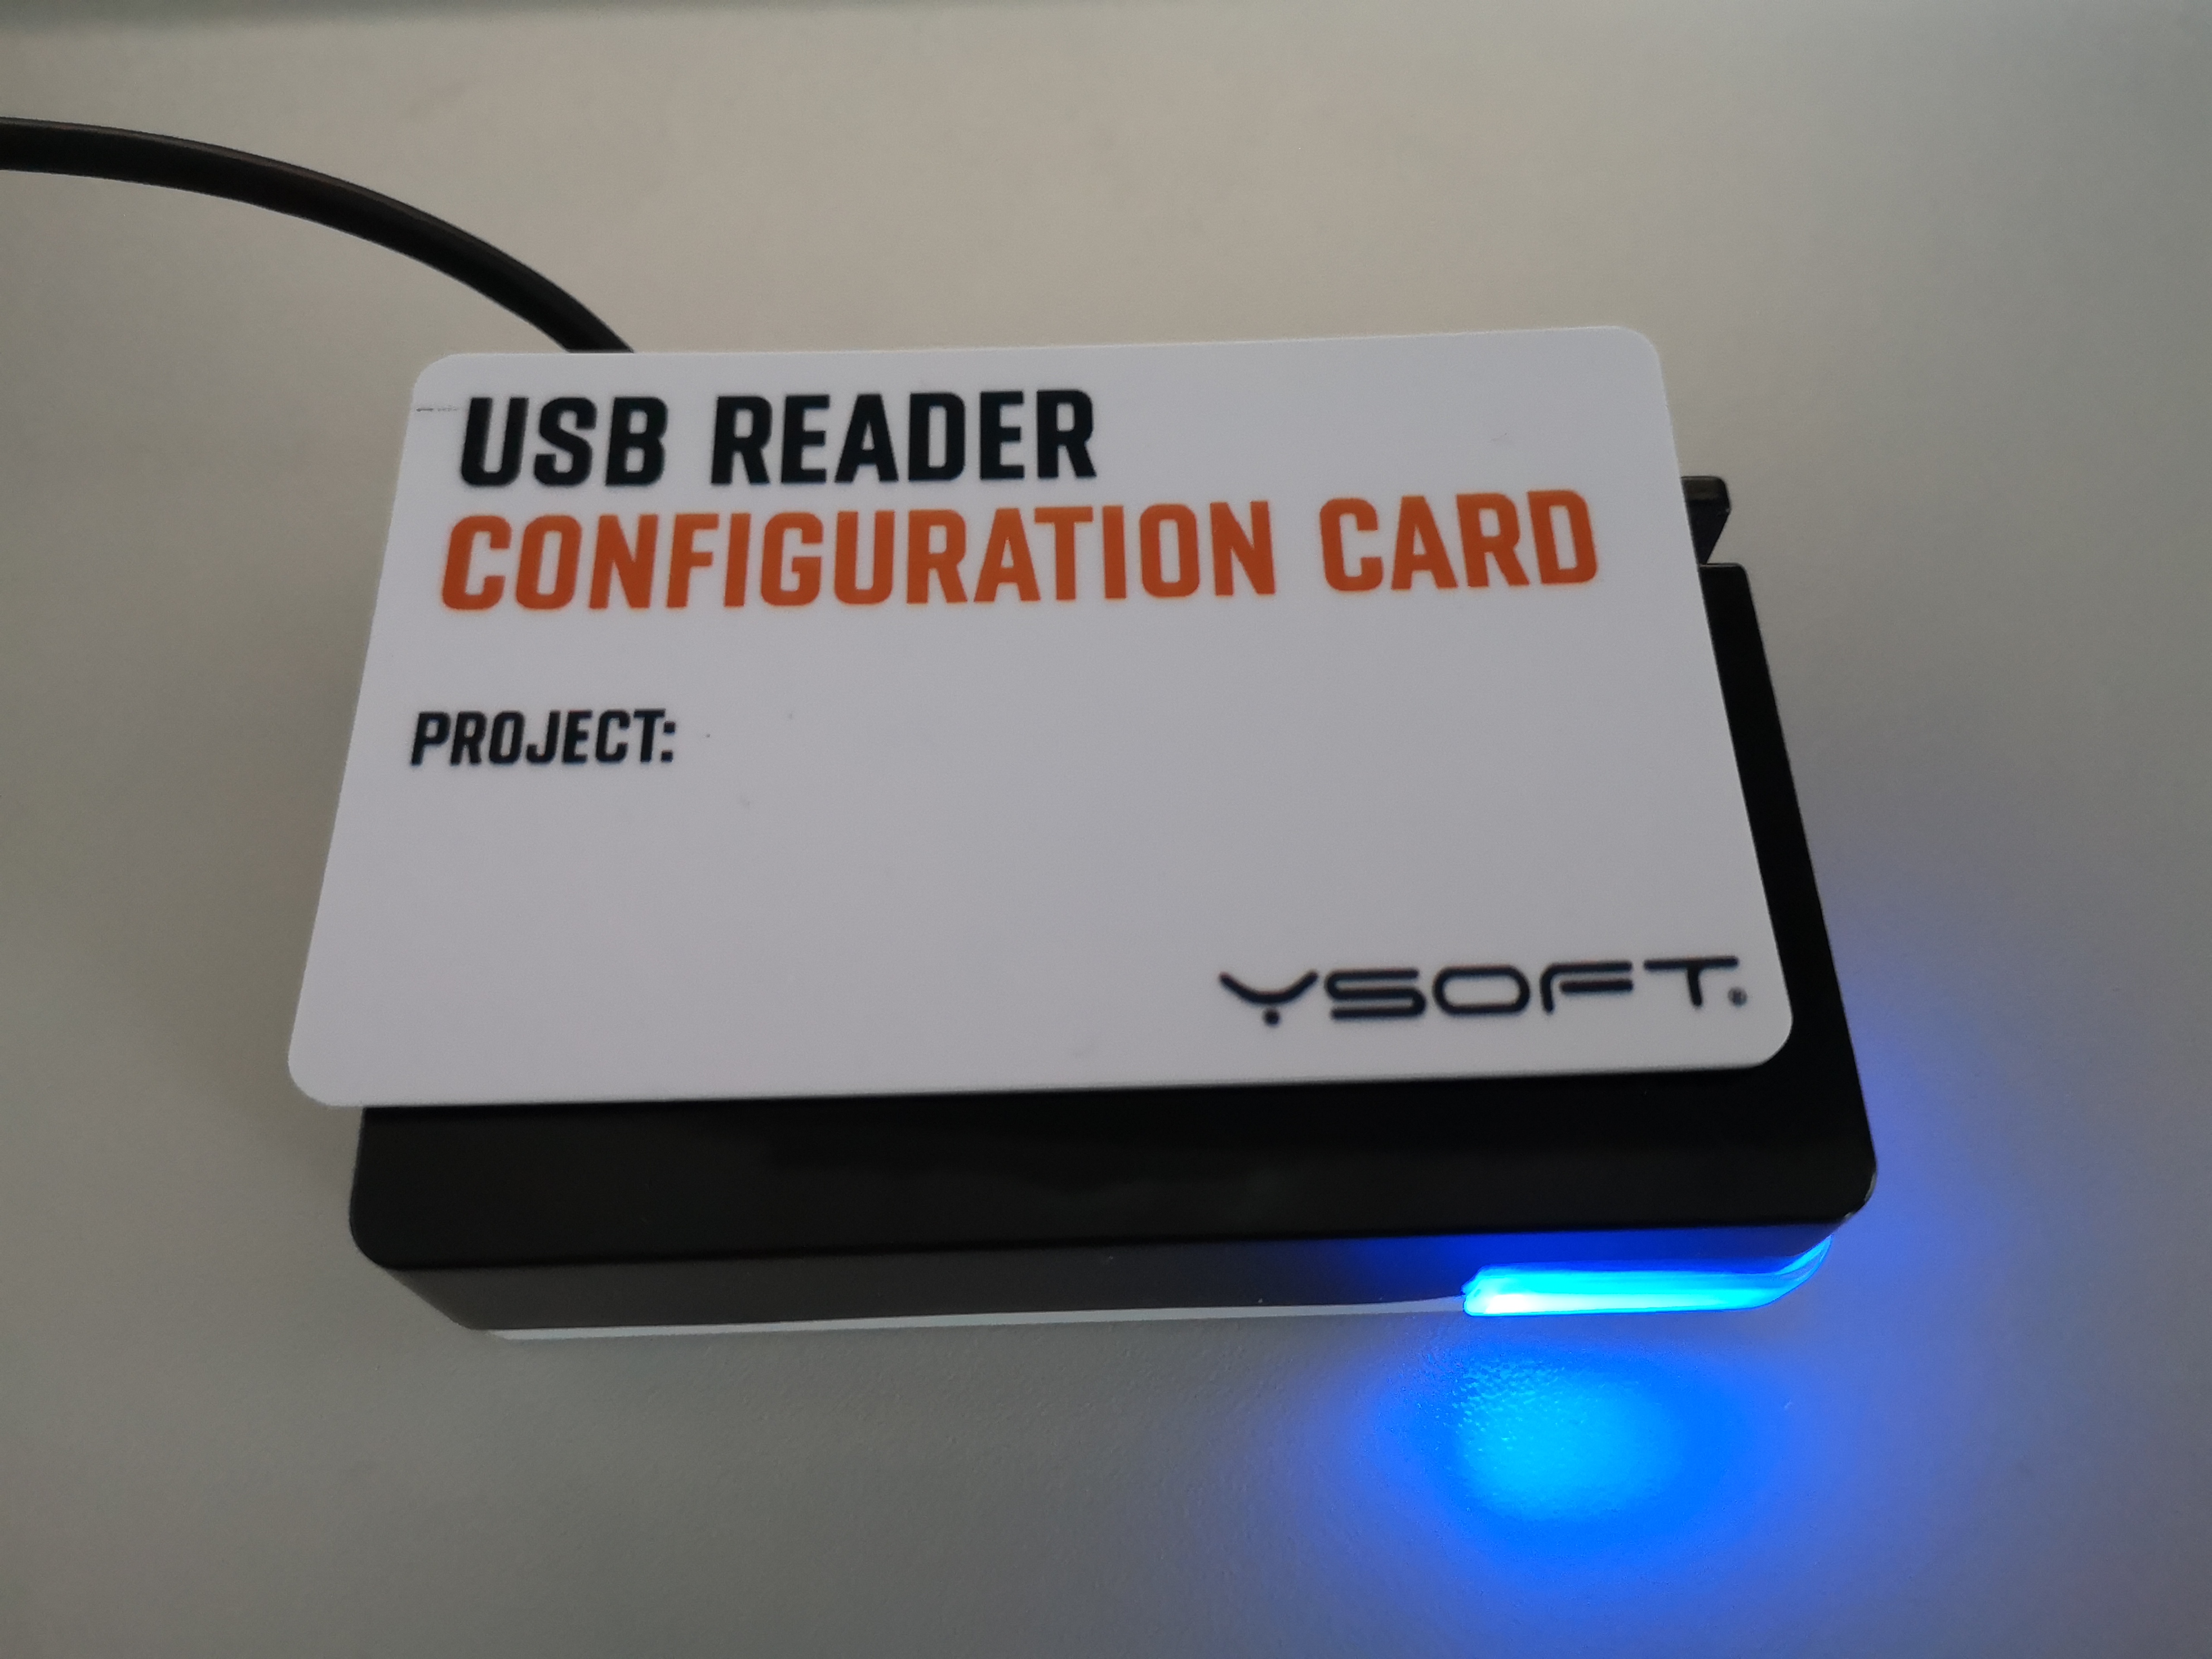
Successful programming is indicated by green LED color and beep sound.
Remove configuration card
USB reader will reboot and use new configuration.
Check that MFD and card reader are working properly. Some MFDs might need restart after card reader programming.