Edit workflow
A scan workflow is best described as a blueprint of instructions on how to capture, process and deliver a scanned document. Workflow definition consist of several parts:
-
General information used for workflow identification and displaying help on Dispatcher Paragon terminal
-
Destination using predefined connector with additional settings for defining where and how scanned documents will be stored
-
Optional user inputs allowing users to enter additional information that will be collected alongside the scanned document
-
Scan settings that instruct a Dispatcher Paragon terminal on how documents will be captured (i.e. scanner parameters)
-
Access rights specifying which Dispatcher Paragon roles can use the workflow
Let's have a look at how to configure scan workflows.
General
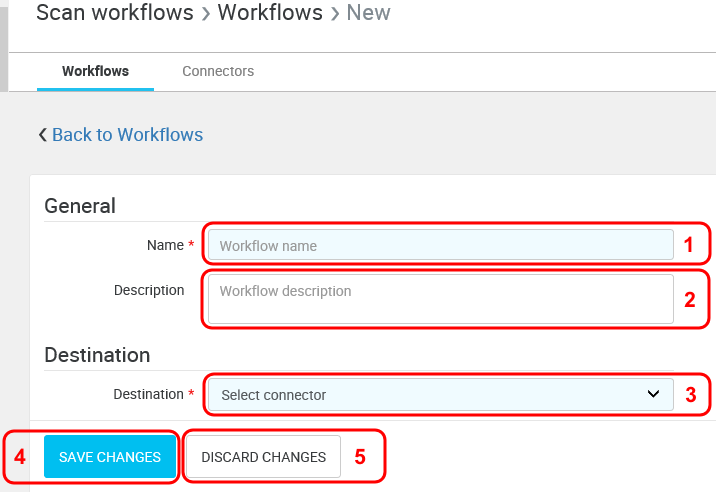
First, you configure general properties of a workflow.
-
Name - Name of workflow that will appear on Dispatcher Paragon terminal.
-
Description - Description of workflow that will appear Dispatcher Paragon terminal.
-
Destination - Select a connector the workflow will use to deliver scanned files to a destination. In order to select a destination connector, ensure you have previously created a connector to an external system (see Connector List).
-
Save changes - It is important to save all the changes when you are done with editing of the workflow.
-
Discard changes - You can always discard all your changes if you need to.
Destination
After selecting a destination connector, you may configure properties specific to individual connector types.
File system
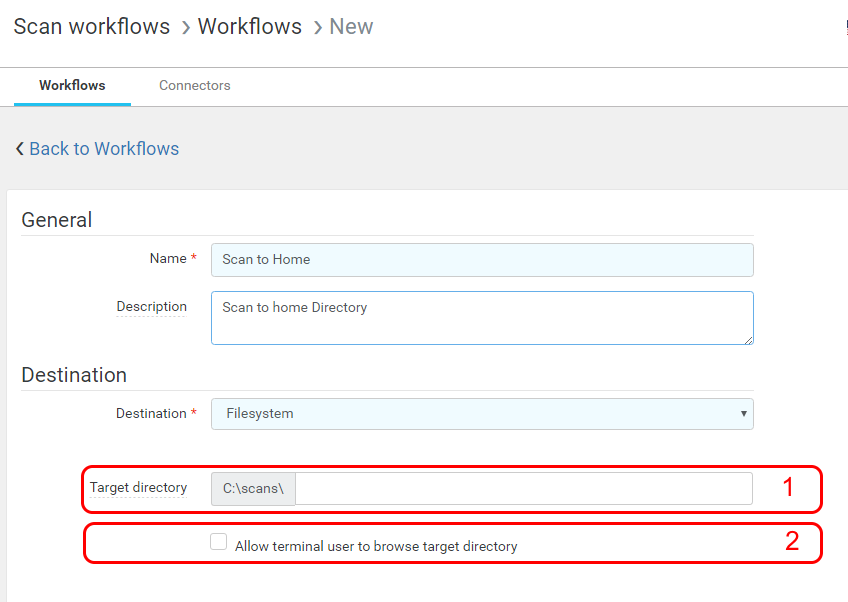
Selecting a file system type connector as workflow destination lets you store scanned files to a local or network file system either in a subdirectory of a connector's base location or directly in the base location. Connector can be configured as browsable, so Dispatcher Paragon terminal users can interactively browse the structure of a selected target directory and optionally select one of its subdirectories as the target.
-
Target directory (optional) - Directory where the workflow delivers scanned files, relative to the connector's base location. You may use capture variables. Process and user input variables are supported only if browsing is disabled (you cannot browse a path which is defined by user input). Please keep in mind that you are limited to characters that are allowed to be in paths.
-
Allow terminal user to browse target directory - If checked, Target directory is not a final destination. A new user input field is automatically added, which allows terminal user to browse and select a subdirectory of Target directory as destination. When this option is checked, an edit button appears, which you can use to edit title of this parameter. The user input is also visible in the "User input fields" section, so you can arrange it. Please see Workflow user input fields.
If you want to allow users browse target directories, then the service account under which the Workflow Processing System runs must have Read access to Target directory and all sub-directories that can be used as scan destination.
Email (SMTP)
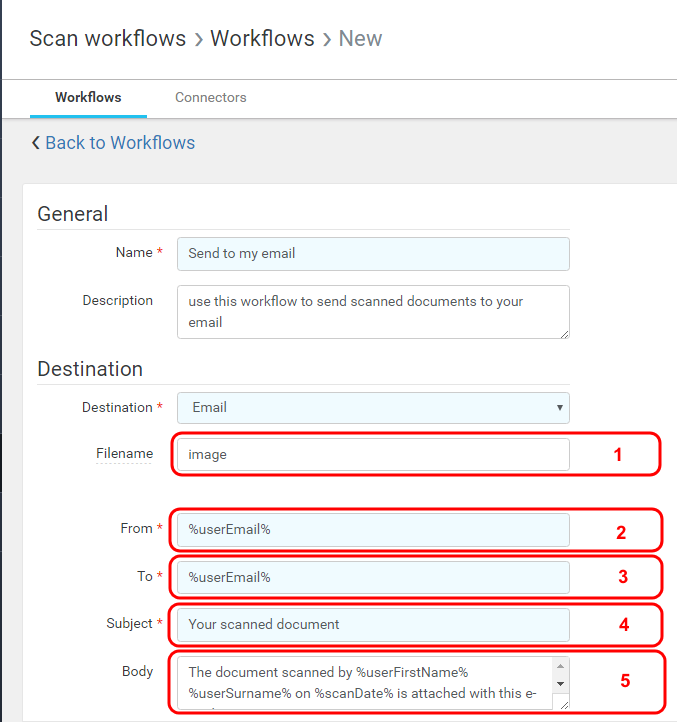
Selecting an Email (SMTP) type connector as workflow destination lets you deliver scanned files by email to one or more email addressees.
-
Filename (optional) - Name of the resulting scanned file (without extension). You may use process, capture and user input variables . If the scan workflow produces multiple files, the filename is appended with a numeric sequence in the "####" format, e.g. "0001", "0002", etc.
If you leave the filename field blank, filename generated by the device where scan was made will be used.
-
From - Email address from which the email is sent. You may use process, capture and user input variables.
-
To - Recipient email address. You may use process, capture and user input variables.
Multiple Email addresses can be separated by comma "," or semicolon ";".
-
Subject - Email subject. You may use process, capture and user input variables.
-
Body (optional) - Email body. You may use process, capture and user input variables. You may also use html tags to format the body.
Microsoft Exchange
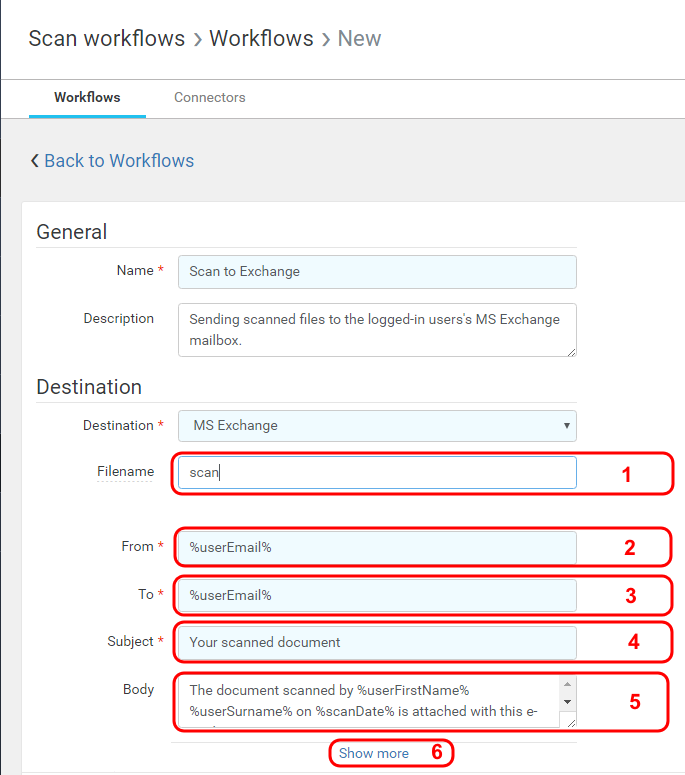
Selecting an Microsoft Exchange connector type as workflow destination lets you deliver scanned files by email to one or more email addressees. Microsoft Exchange is widely used in companies and the connector allows more precise configuration than Email (SMTP) connector.
Basic settings
-
Filename (optional) - Name of the resulting scanned file (without extension). You may use process, capture and user input variables. If the scan workflow produces multiple files, the filename is appended with a numeric sequence in the "####" format, e.g. "0001", "0002", etc.
If you leave the filename field blank, filename generated by the device where scan was made will be used.
-
From - Email address from which the email is sent. You may use process, capture and user input variables.
Field can be used only when connector is configured without impersonation in connector configuration. Please see Microsoft Exchange connector configuration for more detail.
-
To - Recipient email address. You may use process, capture and user input variables.
Multiple Email addresses can be separated by comma "," or semicolon ";".
-
Subject - Email subject. You may use process, capture and user input variables.
-
Body (optional) - Email body. You may use process, capture and user input variables.
-
Show more - Click on the link to configure additional settings (below) for the workflow with Microsoft Exchange destination. Please see Additional Microsoft Exchange workflow settings for more detail.
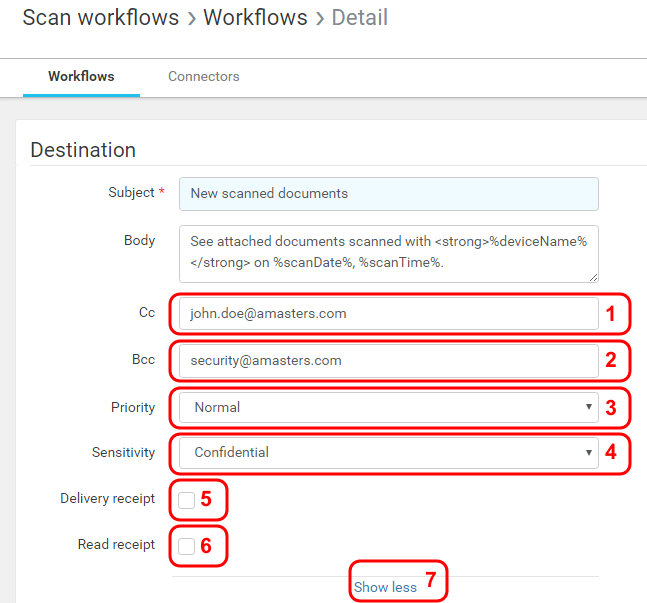
Additional Microsoft Exchange workflow settings
-
Cc (optional) - Carbon copy recipient email address. You may use process, capture and user input variables.
Multiple Email addresses can be separated by comma "," or semicolon ";".
-
Bcc (optional) - Blind carbon copy recipient email address. You may use process, capture and user input variables.
Multiple Email addresses can be separated by comma "," or semicolon ";".
-
Priority - Email priority.
-
Sensitivity - Email sensitivity.
-
Delivery receipt - If enabled, delivery receipt email will be sent to the sender when email with scanned files is delivered to each recipient.
-
Read receipt - If enabled, the read receipt flag will be set in email. If recipient confirms read receipt confirmation email is sent to sender.
-
Show less - The show less link hides additional Microsoft Exchange settings.
Impersonation
When impersonation is enabled in the Microsoft Exchange destination connector (please see Microsoft Exchange connector configuration for more detail), it is not possible to change the value of the From field.
When impersonation is disabled in the Microsoft Exchange destination connector, it is also possible to set the user logged in on the Dispatcher Paragon terminal as sender using the %userEmail% variable in the From field and assigning Send as permission to the service account Microsoft Exchange. However, in this case, the sent email will be in the service account's Microsoft Exchange Sent Items folder.
Output
In the Output section, you can configure output settings of the scanned file.
The following sections provide a summary of the available output options.
Options available in Core Workflows
|
Item |
Options |
Description |
|
Output Format |
|
This option specifies file format of the output file.
|
|
Can be modified by the user on the terminal |
|
When checked user can change the format of scanned file on "Scan options" screen.
|
|
Filename |
String - can contain reference to workflow variables |
Name of the resulting scanned file (without extension). You may use process, capture and user input variables. If the scan workflow produces multiple files, the filename is appended with a numeric sequence in the "####" format, e.g. "0001", "0002", etc. Please keep in mind you are limited to characters that are permitted to be in file names. Characters which are not allowed (*, ?, /, \, |, :, <, >) will cause failure upon scanned file delivery. If you leave the filename field blank, filename generated by the device where scan was made will be used. |
|
If filename already exists |
*) PDF/A-2x formats are not supported now |
Determines the behavior applied if a file with the same name already exists in the target directory. |
Supported output formats
|
Output format |
Real output format |
||||||
|
Konica Minolta, Develop, Olivetti, Aurora |
Sharp |
Ricoh |
Fuji Xerox |
Xerox |
Toshiba, OKI, OKI sXP |
HP |
|
|
JPEG |
JPEG |
JPEG |
TIFF, JPEG Exact format depends on selected color mode. |
JPEG |
JPEG |
JPEG |
JPEG |
|
TIFF |
TIFF |
TIFF |
TIFF, JPEG Exact format depends on selected color mode. |
TIFF |
TIFF |
TIFF |
TIFF |
|
Multipage TIFF |
Multipage TIFF |
Multipage TIFF |
Multipage TIFF, PDF Exact format depends on selected color mode. |
Multipage TIFF |
Multipage TIFF |
TIFF |
Multipage TIFF |
|
|
|
|
|
|
|
|
|
|
Compact PDF |
Compact PDF |
Compact PDF |
|
PDF, Compact PDF Depends on the color mode and resolution selected |
Compact PDF |
|
|
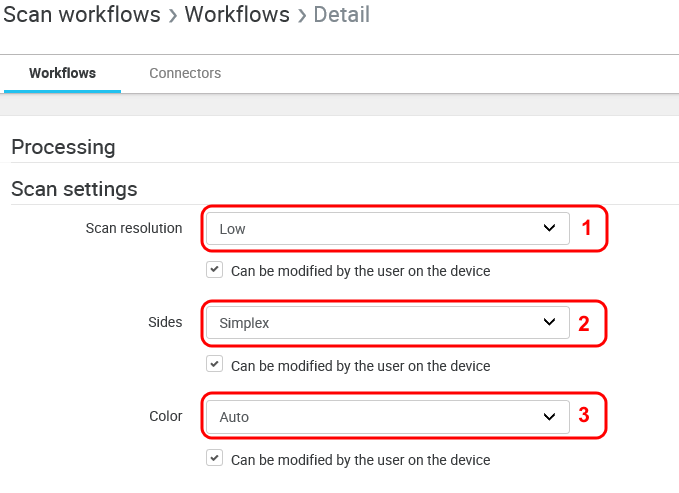
Scan settings
Scan settings are applied to the scanner on the MFD where a Dispatcher Paragon terminal user launches a scan workflow. You can decide whether terminal users will have the ability to modify scan settings by checking or unchecking the "Can be modified by the user on the device" checkbox next to each setting.
-
Scan resolution - This option specifies resolution of scanning. If the related check box is checked then this option can be modified on the Dispatcher Paragon terminal in scan options - quality.
-
Sides - This option specifies whether the document will be scanned as duplex or simplex. If the related check box is checked then this option can be modified on the Dispatcher Paragon terminal in scan options - pages.
-
Color - This option specifies color scheme of a scan. If the related check box is checked then this option can be modified on the Dispatcher Paragon terminal in scan options - color.
|
Not all MFD models support all resolution levels. If an unsupported resolution level is selected, scanning may not start or resolution is set to at least as good as configured or, if not possible, the best one available (this differs for MFD each vendor). |
||||||||||||||||||||||||||||||||||||||||||||||||||||||||
|
Sides |
|
|
Simplex |
Only one page of every sheet will be scanned. |
|
Duplex |
Both sides of every sheet will be scanned. |
Some MFD models do not support forcing duplex settings and user has to set it manually during scan.
|
Color |
|
Full color |
|
Black and white |
|
Two colors |
|
Grayscale |
|
One color |
|
Auto (color scheme is detected automatically by the scanning device) |
Not all MFD models support all color schemes. If an unsupported color scheme is selected, scanning may not start or the color scheme is approximated to the nearest possible value (this differs for each MFD vendor).
User input fields
In the user input fields section, you can define the scan metadata to be collected at Dispatcher Paragon terminal in the form of user input. User input is collected from terminal users in a scan workflow detail. User input values supplied by terminal users are saved in user input workflow variables.
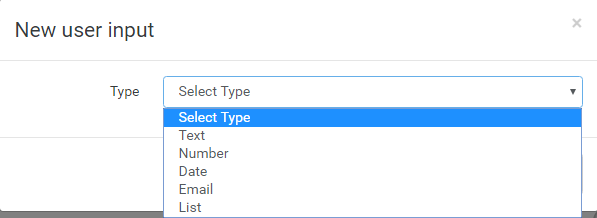
Add user input
Push ADD USER INPUT button, new user input forms opens.
First, you select the type of user input you would like to add to a scan workflow.
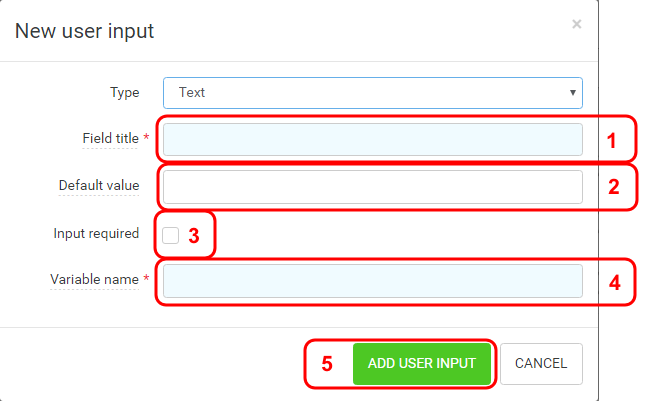
Next, additional configuration options are displayed. Some of the additional configuration options are dependent on the type of user input field selected; however, there are several options common to all types of user input fields.
-
Field title - Title of user input field which will appear in workflow detail on Dispatcher Paragon terminal. You may use capture variables.
-
Default value - Default value of user input field. You may use capture variables.
-
Input required (optional) - If checked, user input must be filled out before terminal user is allowed to scan a document.
-
Variable name - Name of variable which you can use to access the user input value in the workflow. NOTE: Do not use '%' characters.
Press Add user input button (5) to save changes. Press Cancel or '×' button to discard them.
Changes made to user input fields will not be reflected until the scan workflow is saved.
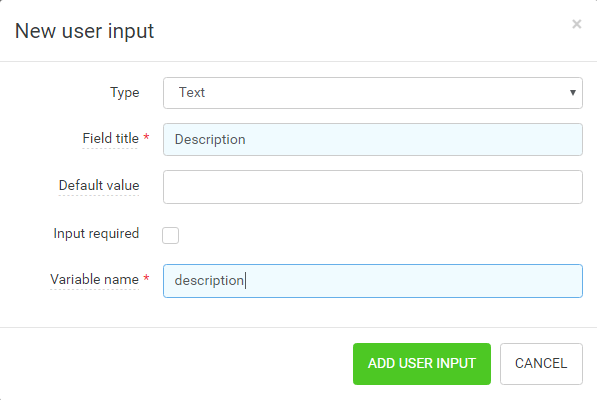
Text
Text type user input fields let terminal users enter free text.
-
You can mark text type user input fields as required.
-
You can specify default value for text type user input fields. You can use capture variables to specify default value.
Number
Number type user input fields let terminal users enter whole positive numbers.
-
You can mark number type user input fields as required.
-
You can specify default value for number type user input fields. You can use capture variables to specify default value.

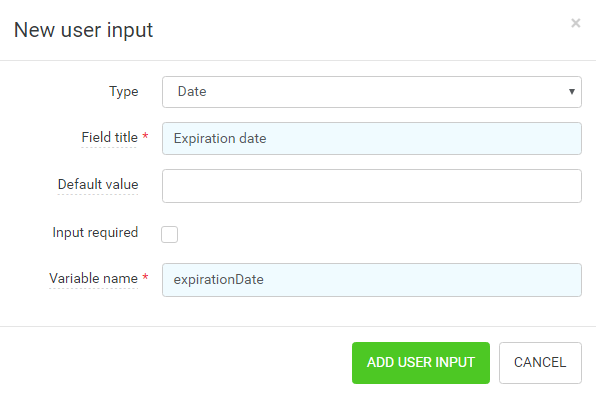
Date
Date type user input fields let terminal users enter dates.
-
You can mark date type user input fields as required.
-
You can specify default value for date type user input fields. You can use capture variables to specify default value.
Value Input is expected in the "YYYYMMDD" format, e.g. "20160719" for July 19, 2016. Capture variables that do not hold values in this format should not be used.
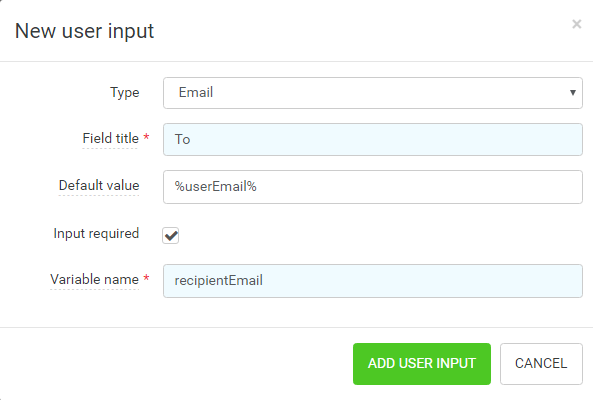
Email type user input fields let terminal users enter email addresses.
-
You can mark email type user input fields as required.
-
You can specify default value for email type user input fields. You can use capture variables to specify default value.
List
List type user input fields let terminal user select from a list of possible values.
-
You can mark list type user input fields as required.
-
You can specify default value for list type user input fields. You can use capture variables to specify default value.
Two kinds of data sources for the list are currently supported by the product.
Manual Input List
The Manual Input List lets you enter list values manually through the Dispatcher Paragon management interface.
-
Data source - Manually input values means that manually entered values will be used to fill selection list on Dispatcher Paragon terminal.
-
List items - List of values for the user input field. The Add row button will append a row to the list items table, where you may insert a value and a label.
Only rows with both Label and Value filled are considered valid.
-
Default value - You can select the default value from the list, which will be pre-selected in the list user input on the Dispatcher Paragon terminal.
Only valid rows are listed as options in the Default Value.
Only valid rows are going to be saved to the list.
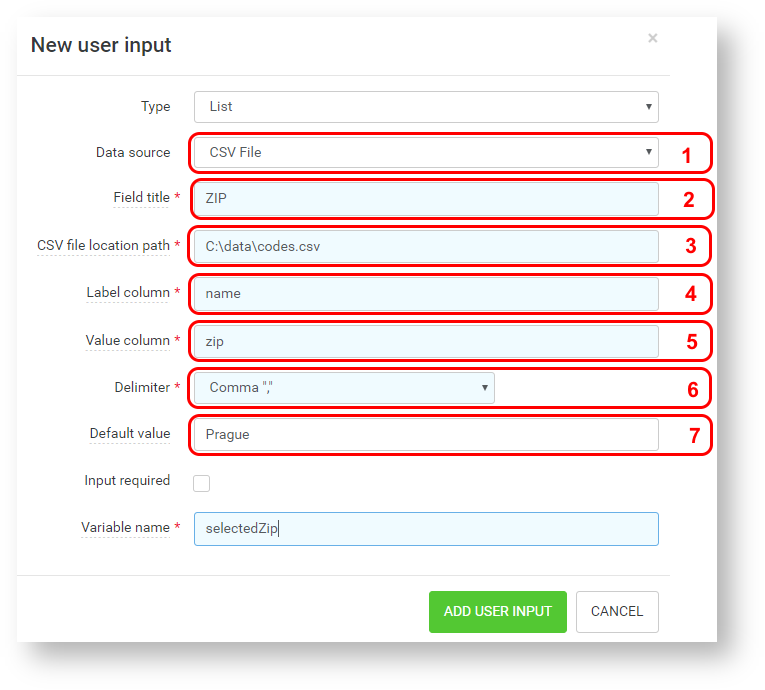
CSV List
The CSV List retrieves data from a source CSV file as specified in the file location path entry. A common use case is that a CSV file is regularly exported by a third-party system to shared folder location and then read by Dispatcher Paragon as a list type input source.
-
Data source - "CSV File" means that a CSV Data source will be used to fill selection list on Dispatcher Paragon terminal.
-
Field title - Title of user input field which will appear in workflow detail on Dispatcher Paragon terminal. You may use capture variables.
-
CSV file location path - Filesystem or UNC path to CSV file containing data.
-
Label column - Name of a column inside CSV file containing list item labels. Labels are displayed as items in the list to Dispatcher Paragon terminal users.
-
Value column - Name of a column inside CSV containing list item values. Values are not displayed to Dispatcher Paragon terminal users, but are saved in the scan workflow variable corresponding to the user input field.
-
Delimiter - The delimiter used to separate fields in the CSV file. Can be comma or semicolon. Default is comma.
-
Default value - You can specify one of the values from data column. In case a valid value (i.e. a value which exists in the data column) was specified, it will be pre-selected in the list user input.
The source CSV file must be in the standard RFC 4180 CSV file format (please refer to https://www.ietf.org/rfc/rfc4180.txt). First row of the CSV file must contain column names. Below is example content of a CSV file you may be used as a list type user input source:
"name","zip""Prague","140 00""Brno","602 00"The CSV file must be accessible to the service account under which the Workflow Processing System runs at the time when the CSV file is read.
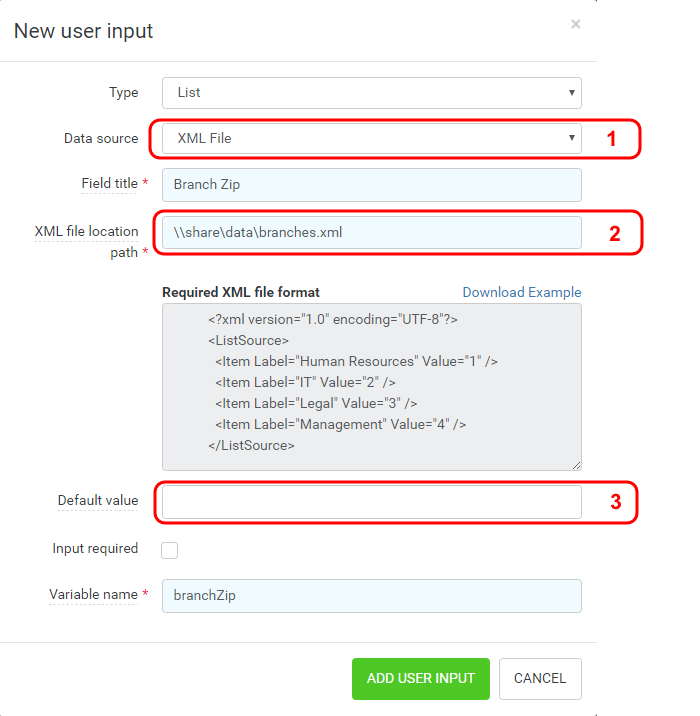
XML List
The XML List retrieves data from a source XML file as specified in the file location path entry. A common use case is that an XML file is regularly exported by a third-party system to shared folder location and then read by Dispatcher Paragon as a list type input source.
-
Data source - "XML File" means that an XML Data source will be used to fill selection list on Dispatcher Paragon terminal.
-
XML file location path - Filesystem or UNC path to XML file containing data.
-
Default value - You can specify one of the values from the document. In case a valid value was specified, it will be pre-selected in the list user input.
The XML file must comply with the required XML file format (an example XML file can be downloaded).
Browse
Browse type user input field is a special type of user input. It can't be created directly. It is created automatically by enabling browsing option (1) in workflow connector definition.
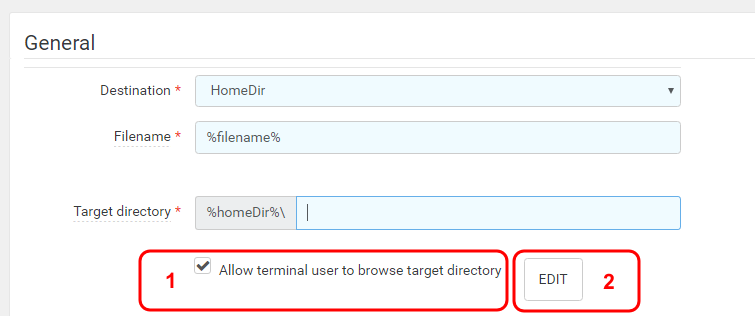
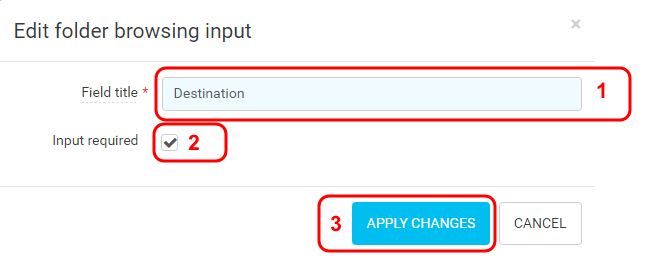
Press EDIT button (2) to open edit folder browsing input field.
-
Field title - Title of user input field which will appear in workflow detail on Dispatcher Paragon terminal. You may use capture variables.
-
Input required - If checked, user input must be filled out before terminal user is allowed to scan a document. When you enable this option, it is expected that the Target Directory contain browsable subfolders, i.e. terminal user can't scan to the root of defined target directory, but must select a subfolder.
Push Apply changes button (3) to keep changes. Press Cancel or '×' to discard changes.
Once a browse type input field is created, you can move, edit or delete it as any other user input field. For the browse type user input field, variable name is always "browseParameter".
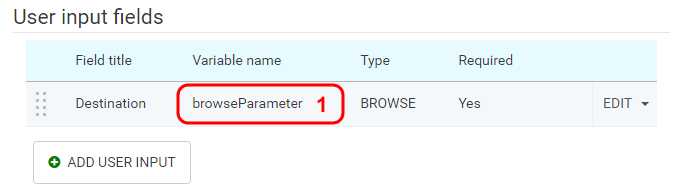
User input list
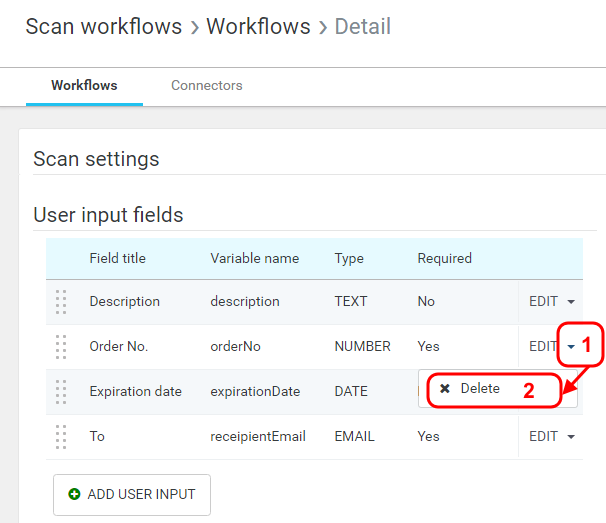
Delete
To delete a user input field, open the dropdown menu (1) corresponding to the user input field you would like to delete and select the delete action (2).
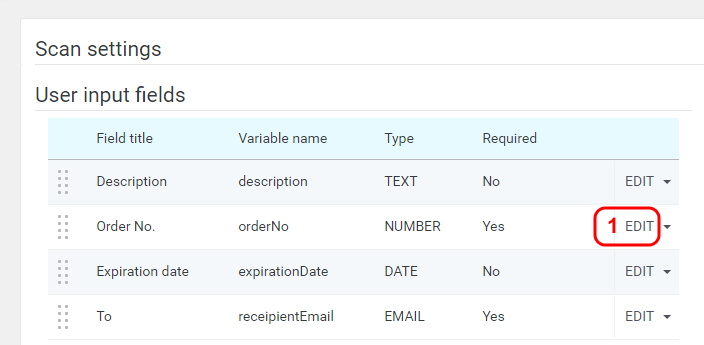
Edit user input
To edit a user input field, click the EDIT button (1). The edit user input dialog opens.
The edit user input form is similar to adding a new user input field, please refer to Add section for more detail.
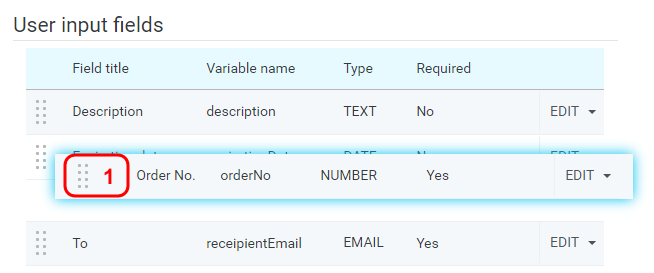
Reorder user input
User input fields are displayed in the workflow detail screen on the Dispatcher Paragon terminal in the same order as in workflow definition.
To change the display order of user input fields, you can drag and drop user input fields using the dotted area (1).
User access
User access allows you to specify which Dispatcher Paragon roles have access to the workflow and which role is forbidden to access such workflow.
Only users belonging to the roles in the Access list will be able to use the workflow. If no role is listed in the Access list, the workflow will not be accessible by any user.

-
Assign roles - Allows you to add a new role, see the dialog bellow.
-
Remove - Removes current assignment.
-
Change access - You can change access to workflow by selecting "Allowed / Denied " from drop down list

-
Search - Filter the values in the table by a given keyword.
-
Sorting - Sort the rows displayed by the selected column.
-
Access - Allow / Deny role to access some particular workflow by selecting a radio button from respective column.
If user has more roles and some of them are allowed to access and other roles denied to access some workflow then the user will not see the workflow on the MFD. Therefore the "Deny" feature is stronger than "Allow" feature. The "None" column is initial state and such role does not have access as well (user does not see such workflow on the MFD).
-
Pagination - Navigate throughout the numerated pages.
-
Apply changes/Cancel - Add selected user roles to the workflow Access list or discard changes and keep the workflow Access list unchanged.
Workflow variables
Variables are used to further customize workflows. You can access the following types of variables:
-
capture variables - Available during the whole workflow lifecycle, e.g. information about logged user, terminal, etc.
-
user input variables - Defined on MFD by user
-
process variables - Available during the workflow processing and delivery, e.g. selected billing code
|
|
workflow user input fields |
workflow destination |
|
capture variables |
|
|
|
user input variables |
|
|
|
process variables |
|
|
Variables start with the '%' character, followed by a variable name (no spaces allowed) and end with the '%' character, e.g. %userEmail%, %barcode%, etc.
|
Name |
Workflow Destination |
Variable Type |
Usage |
|
%billingCode% |
all |
process |
Code of the billing code used for this scan job (can be null, if none is assigned). |
|
%fileLocations% |
all |
process |
Comma separated file paths of all scanned files in destination |
|
%deviceID% |
all |
capture |
ID of the device where a scan was made |
|
%deviceName% |
all |
capture |
Name of the device where a scan was made |
|
%deviceDescription% |
all |
capture |
Description of the device where a scan was made |
|
%deviceGroupID% |
all |
capture |
ID of a group to which the device where a scan was made belongs |
|
%deviceGroupName% |
all |
capture |
Name of a group to which the device where a scan was made belongs |
|
%deviceGroupIP% |
all |
capture |
IP address a group to which the device where a scan was made belongs |
|
%deviceLocation% |
all |
capture |
Location of the device where a scan was made |
|
%deviceIP% |
all |
capture |
IP address of the device where a scan was made |
|
%deviceActivationDate% |
all |
capture |
Activate date of the device where a scan was made (in the 'YYYY-MM-DD HH:MM:SS.MS'format) |
|
%deviceEquipmentID% |
all |
capture |
Equipment ID of the device where a scan was made |
|
%deviceServiceAgreementID% |
all |
capture |
Device service agreement ID of the device where a scan was made |
|
%deviceContactPerson% |
all |
capture |
Contact person for the device where a scan was made |
|
%deviceCostCenterID% |
all |
capture |
Cost center number of the device where a scan was made |
|
%deviceCostCenterName% |
all |
capture |
Cost center name of the device where a scan was made |
|
%safeqHome% |
all |
capture |
The full path to the folder where Dispatcher Paragon is installed on the server where the Workflow Processing System is running |
|
%scanDate% |
all |
capture |
Local date on Terminal Server at the time of a scan in the format yyyy-MM-dd, e.g. `2012-12-21` for 21st December 2012 |
|
%scanTime% |
all |
capture |
Local time on Terminal Server at the time of a scan in format HH-mm-ss-fff e.g. `12-15-00-000` for quarter past twelve |
|
%userCostCenterID% |
all |
capture |
Cost center number of the terminal user who made a scan |
|
%userCostCenterName% |
all |
capture |
Cost center name of the terminal user who made a scan |
|
%userEmail% |
all |
capture |
E-mail of the terminal user who made a scan |
|
%userFirstName% |
all |
capture |
First name of the terminal user who made a scan |
|
%userHome% |
all |
capture |
Home folder of the terminal user who made a scan |
|
%userSurname% |
all |
capture |
Surname of the terminal user who made a scan |
|
%userUsername% |
all |
capture |
Username of the terminal user who made a scan |
|
%fileLocations% |
all |
capture |
Final coma separated list of processed files, including path to file. This variable is accessible only in notifications. |
|
%scanJobID% |
all |
process |
Unique id of the scan job instance. This identifier of the scan job is visible also in the log files. |
|
%scanJobSize% |
all |
process |
Summary of the scan job files sizes. Variable is available only when there is a restriction set on the connector. |
|
%scanJobFileCount% |
all |
process |
The scan job files count. Variable is available only when there is a restriction set on the connector. |
|
%connectorFileCountLimit% |
all |
process |
Max file count restriction limit. Variable is available only when there is a file count restriction set on the connector. |
|
%connectorFileSizeLimit% |
all |
process |
File size restriction limit. Variable is available only when there is a file size restriction set on the connector. |
|
%connectorRestrictionsDirectory% |
all |
process |
Path to the folder where scan jobs are stored when restriction is applied. Variable is available only when there is a restriction set on the connector. |
|
%workflowID% |
all |
capture |
Id of the workflow used to make the scan |
|
%workflowName% |
all |
capture |
Name of the workflow used to make the scan |