Green (Purged Pages) reporting
Configuring Green (Purged Pages) Reports
-
Log in to the management interface with sufficient rights to administer printers (for example, "admin").
-
Go to System > Configuration and set view to expert and search for enable-purge_reports, then switch the property to enabled.
If enabled, green reports are generated regularly in Dispatcher Paragon.
-
Make sure print job parser - Job analysis resolution is set to Low or high (System > Configuration and search for jobAnalysisResolution).
If you want to parse PostScript (PS) jobs, you need to download and install GhostScript parser, see more details in Print Job Parser Configuration article.
-
Set prices for Purge pages. Go to System > Configuration and search for purge_job_price, then configure the price for the following settings:
-
Price for an unprinted A3 B/W page.
-
Price for an unprinted A3 color page.
-
Price for an unprinted A4 B/W page.
-
Price for an unprinted A4 color page.
-
-
Restart the Management Server and FlexiSpooler services.
Generating Green (Purged Pages) Report
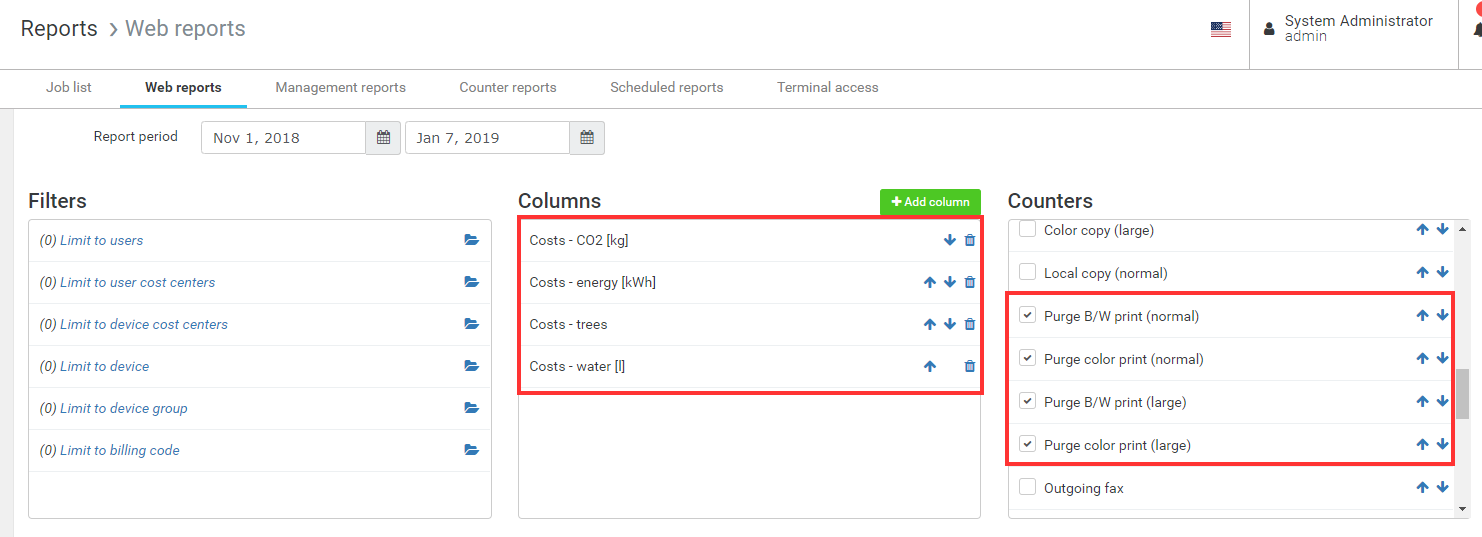
The basic columns and counters used for green reports are the following:
-
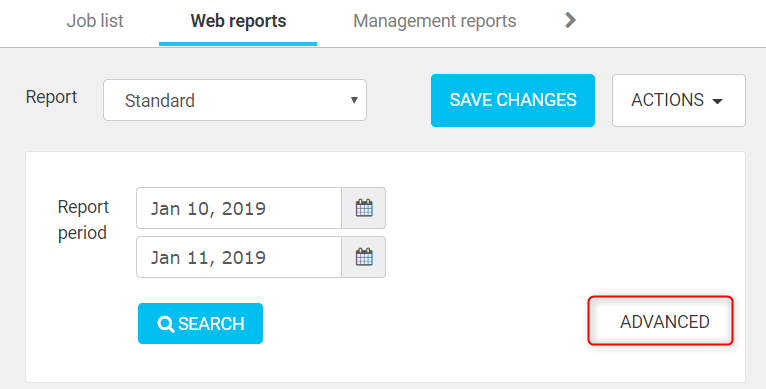
On the Management interface > Reports > Web reports > click Advanced.
-
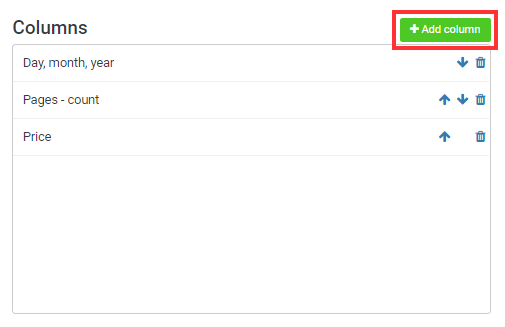
Click the Add column.
-
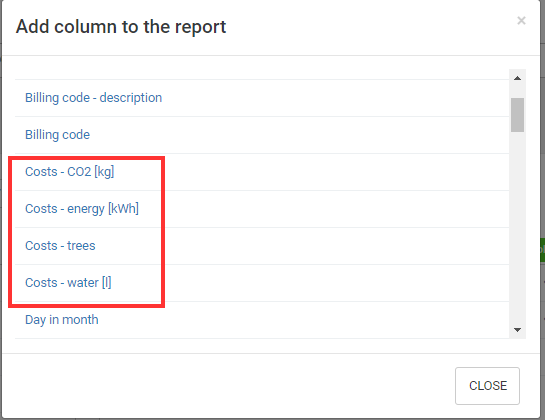
Select all four costs by clicking them:
-
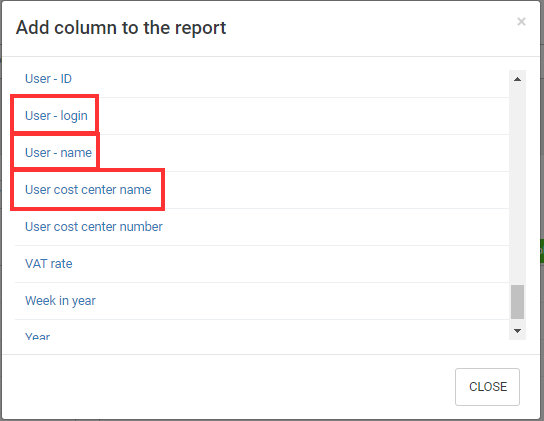
There are two types of recommended reports per department (cost center) and per user:
-
For report per department select the User cost center name
-
For per user select either User - name or User - login.
Any device related column will have no data, the pages where not printed there for they cannot be associated with specific devices.
-
-
Add pages, Papers - number and price.
-
Then press close remove the unnecessary columns by pressing the delete icon (
 ) next to them
and order the columns by using the order icons (
) next to them
and order the columns by using the order icons (  ), it is recommended to move the User or department to the top, for example:
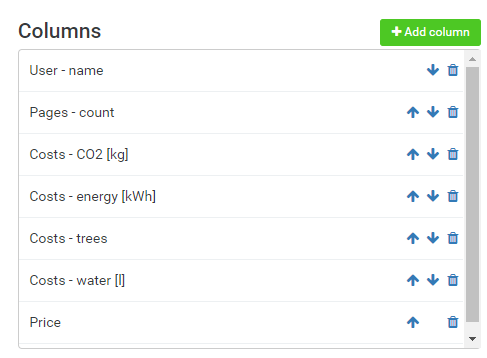
-
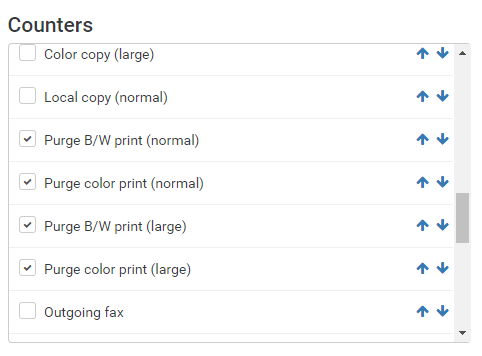
Then deselect all counters, leaving only the purge counters:
-
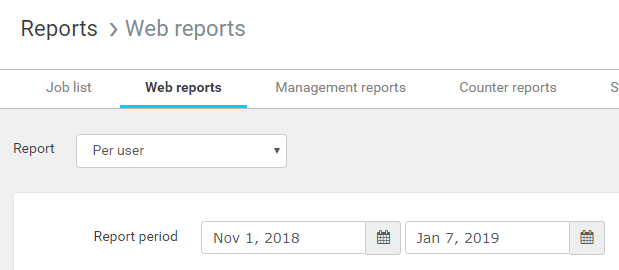
Set the Report period:
-
Click the Search button to view the data, you can change the report build to match your requirements.
-
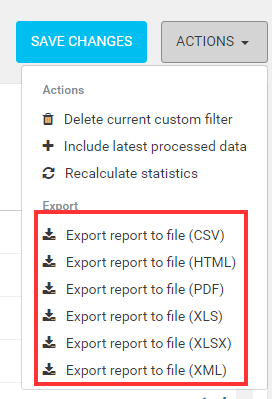
Once the report is ready you can export it by Actions > Export to file:
-
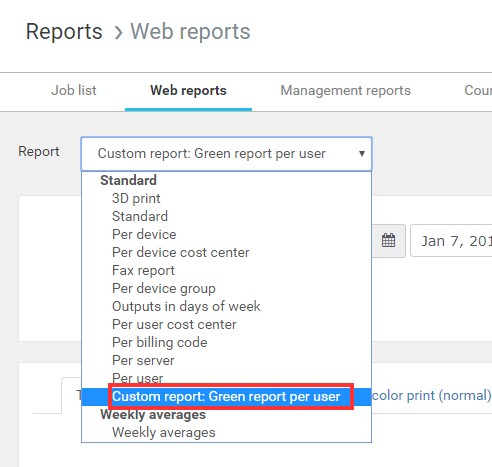
It is recommended to save the report for future use by clicking the Save changes button, typing the report name and pressing the Save new report.

-
The new report will now be available for selection in the Web reports report menu:
-
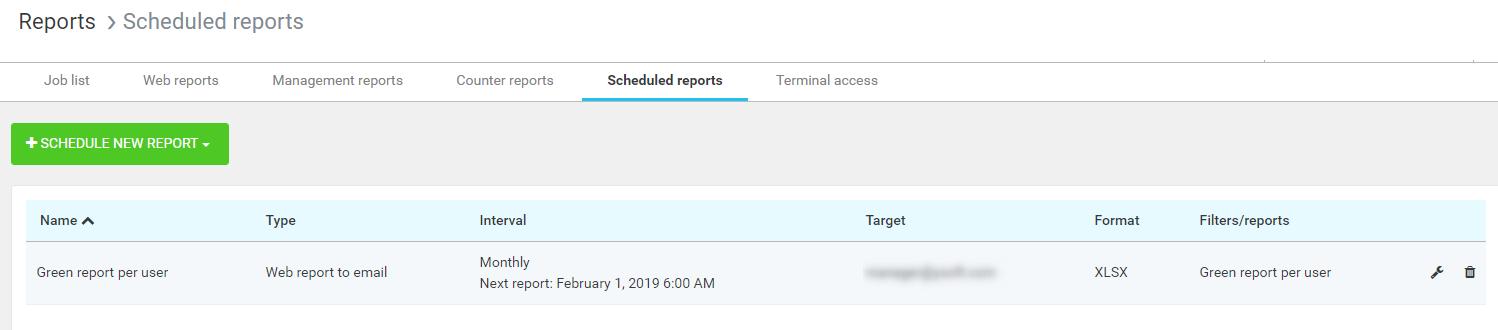
And it can be scheduled for automatic delivery to email or file at Reports > Scheduled reports, for example:
Report Samples
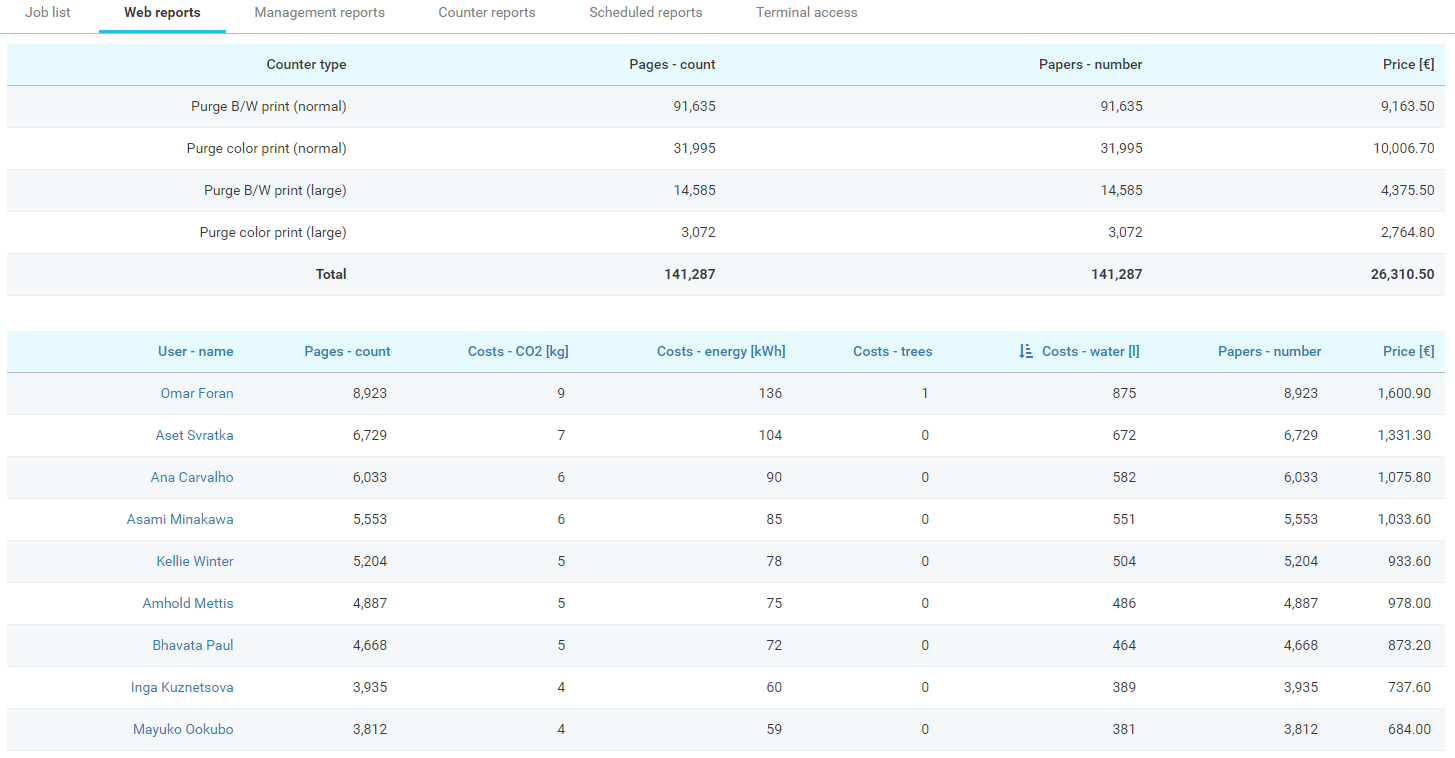
Green report per user:
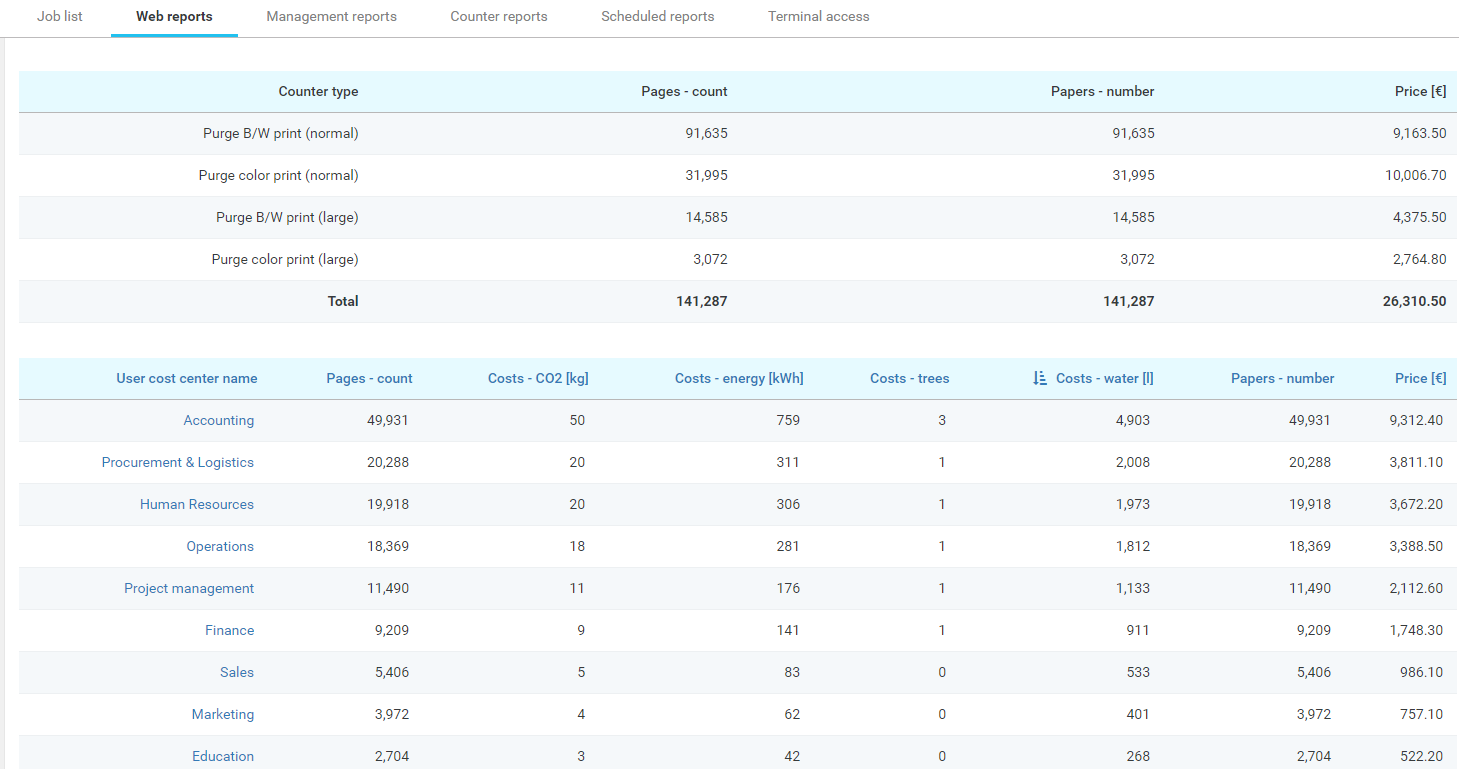
Green report per cost center:
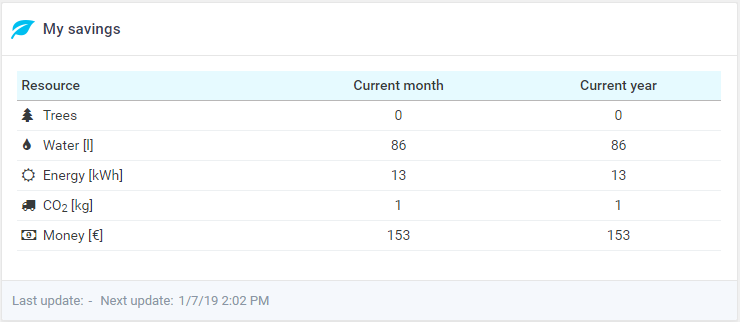
My Savings Widget
One of the widgets available to users after they login to the management interface is the My savings widget, this widget described how many trees, energy, water and CO2 the user has saved. Every non-accounted job with deleted status is counted as purged.
Data are listed for current month and also for current calendar year.